Buckwheat Cheese Straws
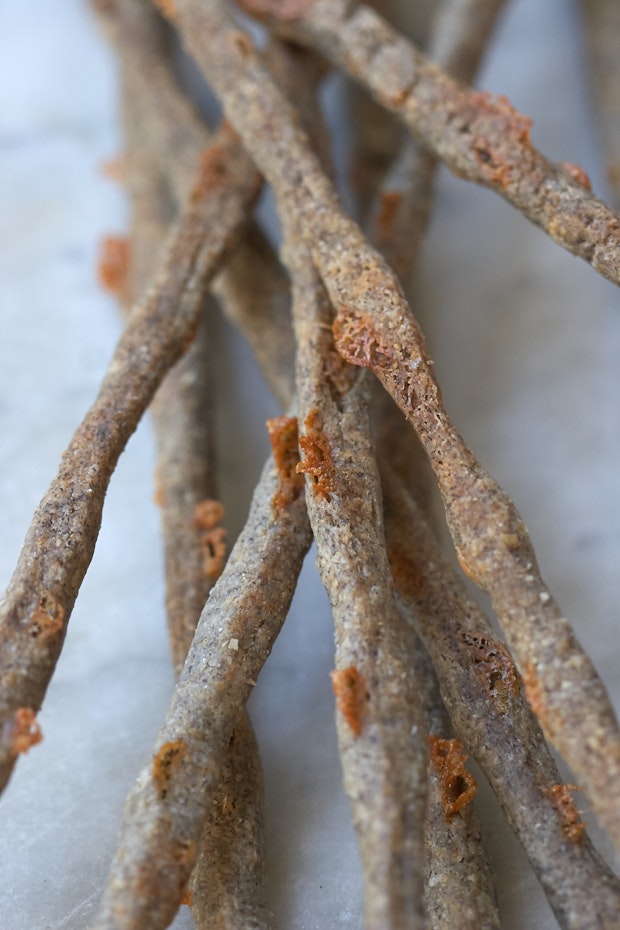
These cheese straws look like wispy tree branches and they never last very long around here. Crispy, cheddar-flecked, and rustic, buckwheat flour lends these slender creations their convincing tone.
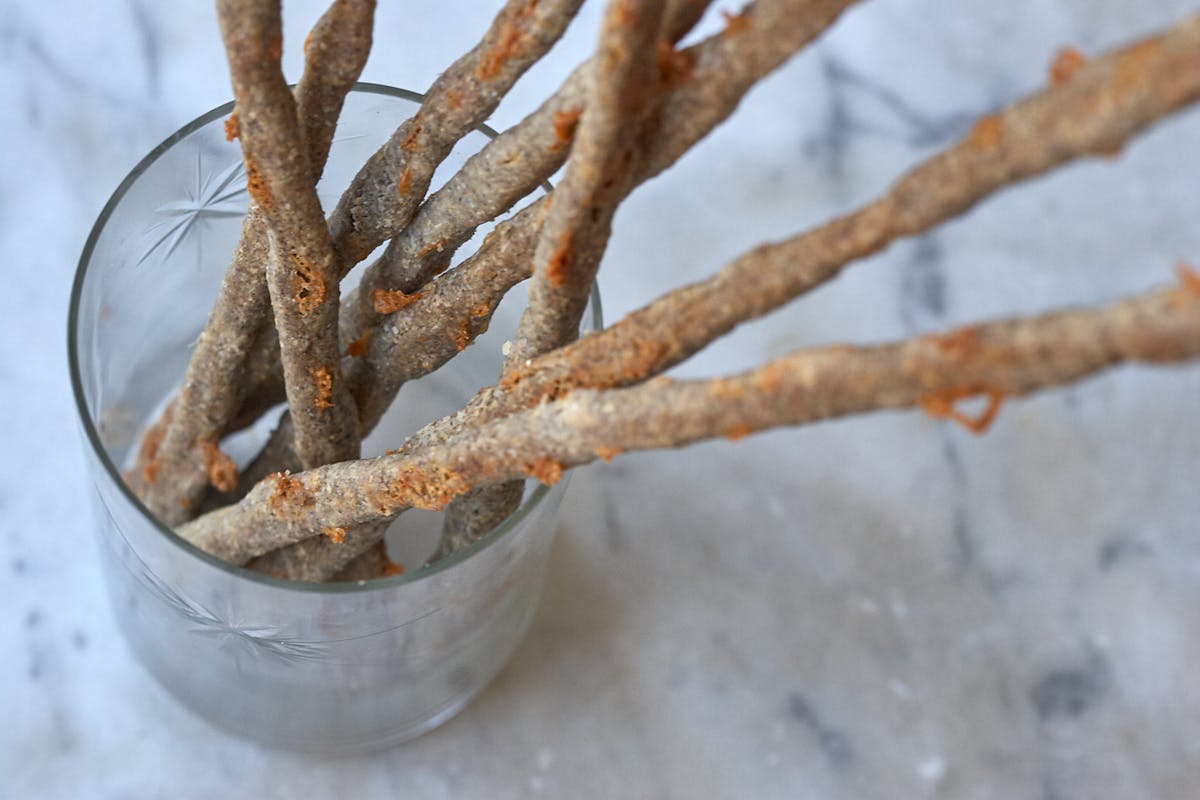
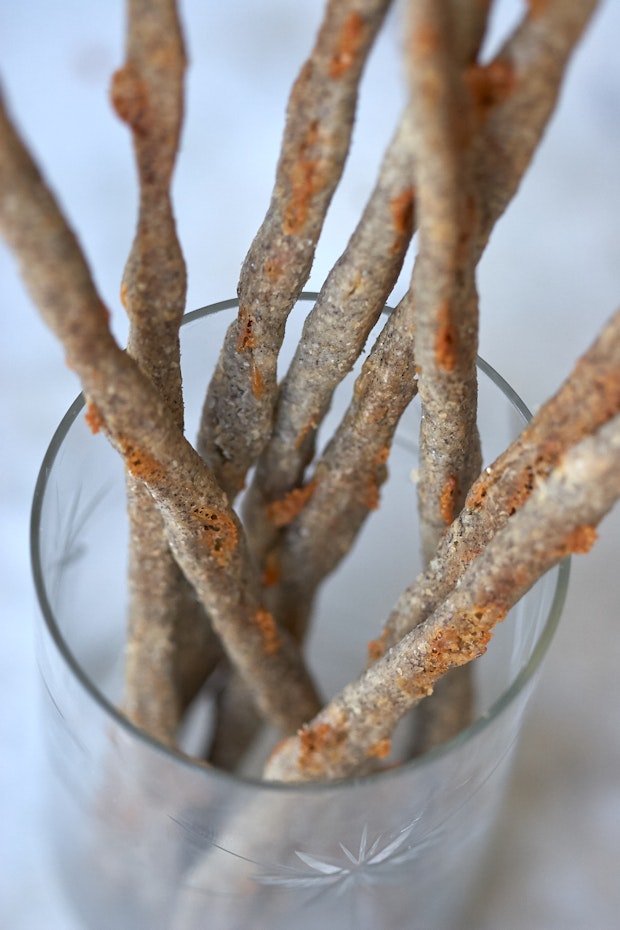
Buckwheat cheese straws never last long when I bake them. They’re tasty, dramatic, butter-kissed and punctuated with baked flecks of melted cheese. To my eye, the toasted cheddar bits look a bit like orange moss - but maybe I'm over-thinking things. After you get the hang of it, these are easy to make. Although, it might take a practice twig or two. The inspiration for this recipe was rye-thyme cheese straw recipe I enjoyed years ago baked from Jerry Traunfeld's The Herbal Kitchen. Think of these as a distant cousin!
Cheese Straws & Edible Tablescapes
Before we get to the recipe I should also say, another thing I love about cheese straws is all the ways you can display them at the table. They make a dramatic centerpiece standing upright in a small glass or jar, but are just as much fun lying down, stacked and tangled together like an edible pile of sticks. Big bouquets of cheese straws in larger vessels is the way to go if you have more baking capacity. The drama!
How To Make Buckwheat Cheese Straws
If you know how to make pie dough, the process here is quite similar. To start, butter and flour is combined until a sandy texture is achieved. Ice water is added to bring the ingredients together and formed into a patty. Chill until ready to shape the straws.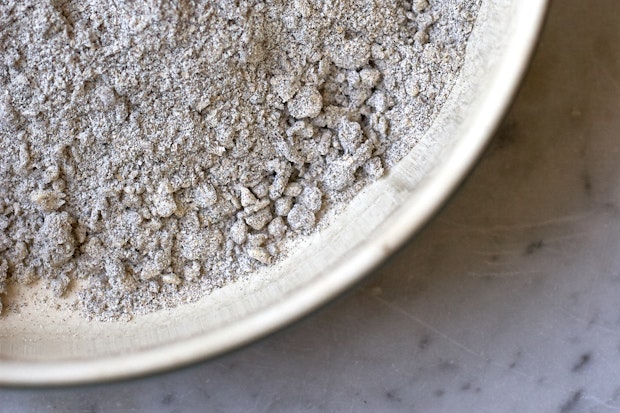
Next, roll out the dough on a floured surface. Cut into strips as pictured below.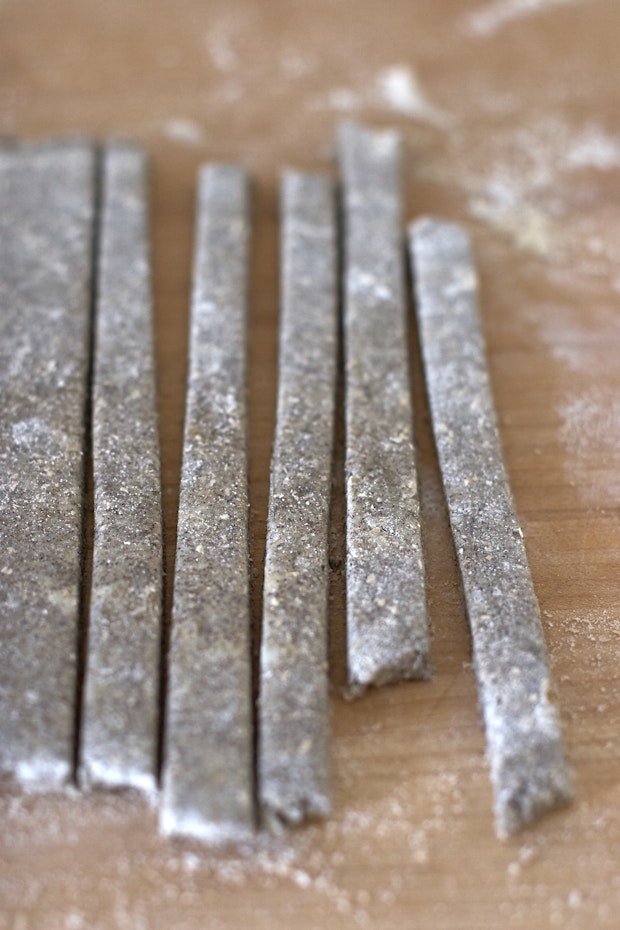
For the final straw shape, roll the dough into long pieces and arrange on a parchment lined baking sheet. Bake until golden and crisped.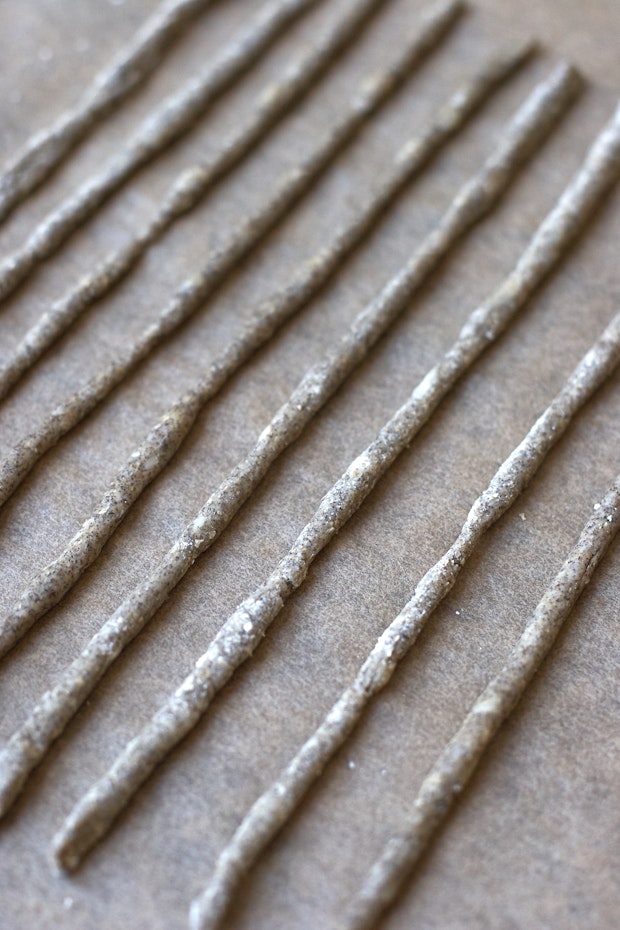
Other Shapes?
If you get tired of making straws, you might stamp out various shapes. I haven't tried it with this exact dough, but I suspect it would work nicely. Keep the dough 1/4-inch thick or less, and keep a close eye on things while they are baking.
Cheese Straws: Variations
You can certainly experiment with a number of the variables here. This recipe calls for a cheddar, but you could certainly experiment with gruyere, Swiss cheese, pecorino, or other hard cheese. I’ve also noticed a few great suggestions in the comments including this one.
- Cheese ribbons: Sue says, “For a variation, my ex-husband, the chef, used to run breadstick dough thru the pasta machine, let it rest (in fridge?), cut it in very long, very thin strips, then twist them and even roll the tops of the sticks around something tubular while baking. Very fanciful, magical centerpieces. And sprinkled with large grain salt, they sparkle!”
Other Homemade Crackers

Premium Ad-Free membership includes:
-Ad-free content
-Print-friendly recipes
-Spice / Herb / Flower / Zest recipe collection PDF
-Weeknight Express recipe collection PDF
-Surprise bonuses throughout the year
Buckwheat Cheese Straws
The buckwheat flour here gives these cheese straws a depth that others made from all-purpose flour don't have. That being said, you could certainly give these a shot using all whole wheat pastry flour, spelt flour, or unbleached all-purpose flour. Or experiment with other flours in place of the buckwheat flour.
- 1/2 cup buckwheat flour
- 1 cup whole wheat pastry flour
- 1 teaspoon fine grain sea salt
- 1 teaspoon fresh thyme, chopped
- 8 tablespoons (4 ounces) unsalted butter, cold, cut into 1/4-inch cubes
- 3/4 cup (2 1/2 ounces) white cheddar, shredded on a box grater
- 1/2 cup ice cold water
-
Combine the flours, salt and thyme in a bowl of a food processor. Add the butter and pulse until the mixture resembles little pebbles in a beach of sandy flour (about 20 quick pulses). Alternately, you can cut the butter in using a knife and fork. Transfer to a mixing bowl and toss in the cheese. Sprinkle with ice water and use your hands or a spoon to stir it through and bring everything together into a ball of dough. Flatten the ball into a 1-inch thick square patty, wrap well in plastic, and place in the freezer for thirty minutes.
-
In the meantime, preheat your oven to 400°F degrees. Line a baking sheet with parchment paper or a Silpat, and place a rack in the middle of the oven.
-
I find it easiest to work with one half of the dough at a time. Remove the dough from the freezer, cut in half, re-wrap the half you won't be using immediately, and place it back in the freezer. If the dough gets too warm it is difficult to work with. On a well-floured surface roll out the remaining dough into a rectangle roughly 6x12-inches and 1/4-inch thick. Use a knife to cut 1/2-inch wide strips (see photo), each about 6-inches long. Now take a strip of dough and gently pinch it all along its length so that it is easier to roll out into a straw shape roughly 12-inches long. If the dough is giving you trouble, consider chilling it a bit longer. Place each straw on the prepared baking sheet, and repeat with the remaining strips, leaving at least 1/2 inch between each straw.
-
Bake the straws one pan at a time for about 8-10 minutes, or until the straws look set, and the cheese is golden where it is touching the pan. Flip each straw and bake for another 2-3 minutes on the other side. Keep in mind if your straws are on the thin side, they'll bake in a flash, if they are slightly thicker they will need to go longer. Remove from oven and let cool, they will crisp more as they cool.
-
Sometimes I bake off half the dough, and keep the other half in the freezer for another day, but feel free to bake all of it - repeating the process with the second half of reserved dough.
Makes about 4 dozen straws.
Related Recipes
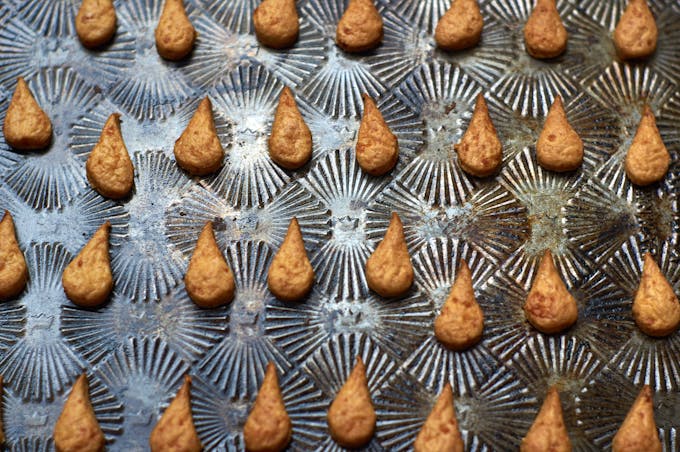
Homemade Cheese Crackers
The fantastic homemade cheese crackers I made for my nephew when he came to stay last week. Inspired by a recipe from Alana Chernila's The Homemade Pantry.
All-Butter Flaky Pie Crust
Most pages about pie crusts are going to point you to their “best ever” pie crust, but I’m taking a slightly different approach. I’m going to share a few of the inspirations that have impacted my pie baking over the years along with the pie dough recipe I currently use and love. Pie baking is a journey, and there are a few places I’d recommend jumping on or off along the way.
Post Your Comment
Comments
Grand Idea ! I will be try them soon ! They look delicious ~
oh wow. i will have to try these. they would be great for holiday partys too, they looks so cool. sound healthy and delish. plus pretty simple. thanks :)
I made this the other night and it is AWESOME!! Thank you for sharing the recipe. I will be adding it to my collection for sure. Two thumbs WAY UP!
Wow they do look like tree twigs, but I'd love to try them. I'll take a trees-worth please
WOW thats so so so creative! i NEED to make those for our next gathering! have to have to have to!! i made cheese sticks b4! but these r in a different league :P
I eat gluten & sugar-free and am sure that this is recipe could easily be made gluten-free. I'm going to try it and see what I can come up with. They look delicious!
I love cheese straws - Mum used to make them for us when we were younger. I will have to share this recipe with her. Thanks Heidi!
Its amazing how they go from a kind of grayish color to brown in the cooking. They look almost like they're going to jump right out of the screen in your wonderful picture. I'd probably use something other than thyme (like fresh garlic and/or chives) myself, but I usually try recipes first like their written before I start my mad chemist routine (and do things my way). This looks fun!
I'm with you--the cheese does look a bit like moss. In this case, that's a good thing. These are the sort of recipes that help get me out of ruts--i.e. warm up bread in the oven. I'm doing food for an autumn party at an art gallery soon, and these would be so perfect. I will give you credit, of course :)
i Love it!
mmmmm...email me da taste...lol
Love the idea of using this as a center piece!
Oh, cheese straws. How do I love thee? Let me count the ways. The crunch, the twiggy snap, the complex cheesy flavor, the entertainment value (good for fencing if you're bored). I bet the buckwheat makes these a real treat -- plus it lowers the glycemic impact. I'm heading to an outdoor concert/picnic this week and I think these will be the perfect thing to bring along with a good bottle of rose'.
Wow these look so neat! They remind me of tree limbs...haha.
Ooh cute, the 1st thing I thought of was Halloween party food! I wonder if it would work with Teese cheeze or Joanne Stepaniak's block colby? I need to try that...
These look terrific, I love cheese straws, cheese crackers, really just cheese :) but can't wait to have a few twigs now!
Those look gorgeous. I love the rustic appearance of them because it makes them so different than what I normally think of as cheese straws. I love baking with buckwheat flour and this looks like it would be a great use of it.
These look like fun for a buffet table. would also like the rye-thyme straws recipe, i have two differnt rye flours to use.
I love Buckwheat!!! These look awesome. Perfect for fall! Could you also make them in a flat, round cracker shape?
What a perfect addition to fall entertaining. Will be axious to serve these at the next gathering.
these are beautiful! i was experimenting with savory crackers for a while too, and there's something about them that makes them always come out right. perhaps it's because i'm not cheap with the butter...
Wow, these look incredible. They would be so perfect in a nature-themed wedding/party.
I love the visual appeal of these, and I like the flavor of buckwheat flour. I have to try these!
oh how fascinating! they make a really nice decoration too. lol
Wayne is right - they do look like twigs :) I have a a little bag of buckwheat flour and these do look interesting!
buckwheat in India is a grain used during hindu fasting....we make soups and stews with it and some fried crackers....i am getting new ideas to prepare it... thanks for sharing....it really looks like twigs.
These look fantastic and I love anything with buckwheat. I Was wondering if you have ever made them with olive oil instead of butter?
I love buckwheat. Really love it. I can't wait to try these. They sort of take the guilt out of cheese straws, don't they?
These look totally amazing by the way! It does look like moss.
Can somebody tell me what ice water is exactly? Is it just really cold water? I'm from the Netherlands and have never heard of it before in cooking. Thanks!
Hi Inge - yes, just very cold water.
These look great. I avoid the traditional cheese straws made with layers and layers of butter. This one looks a bit lighter and the fiber from the buckwheat is an added benefit. Thanks for the recipe.
if I used ordinary whole wheat flour, should I use a leavening agent? I have never seen ww pastry flours where I live(Small Town, Canada)
Heidi - these look & sound super! Your site is always a great treat. Thanks. For a variation, my ex-husband, the chef, used to run breadstick dough thru the pasta machine, let it rest (in fridge?), cut it in very long, very thin strips, then twist them and even roll the tops of the sticks around something tubular while baking. Very fanciful, magical centerpieces. And sprinkled with large grain salt, they sparkle!
YUM! What a great idea! Those look delicious!
Great photos and the straws look tasty! We'll have to try them soon. Thanks!
Heidi, I'm giving these a try,as soon as I can make it to the store tomorrow for the buckwheat flour! I have Celiac and would love some new recipes for breads, crackers, pizza dough, low calorie cookies, anything you can help with. It is a challenge to come up with satisfying and tasty new foods to substitute for traditional wheat laden foods. My darling daughter turned me on to your site. I LOVE your recipes and I have incorporated many into my repertoire. Whenever I try something new from you, my husband, a true carnivore, is very pleased! Thank you so much for all the inspiration!
These look perfect for Halloween. I make a cheese spread that includes gorgonzola in the recipe that turns it slightly greyish then form it into a flying ghost shape. The "sticks" would go perfectly with it.
These look gorgeous. What a wonderful centerpiece idea...so colourful and they would look great on our Canadian Fall dinner table. I think the cracker idea is a wonderful one... especially for young kids to make.
I bet if I made these in my home, they'd definitely be gone in a flash. I'd have to make more than the four dozen with how fast these might disappear. I'll give it a try. I may even try some other herbs in addition to thyme- just to experiment a bit.
Buckwheat is part of my Russian Jewish heritage, as is kasha. I like trying out different grains. Yesterday I made a summer salad with quinoa instead of couscous. Today will be the day to try it out. I used almond butter instead of tahini.
so cute! I'm on a bit of a buckwheat kick at the moment so these are a must try!
These look like fun to make! And they're definitely centerpiece or garnish-worthy. Can't wait to try these!
Rustic, moreish and so full of character. Just gorgeous Heidi. I love the use of buckwheat. Hv used this grain in your lasagna tart, in the cacoa nib cookies and cheese cookies too. fabulous! Can't wait to make these knobbly twigs!
Those are absolutely gorgeous! Also, this gives me another reason (excuse) to go get some buckwheat flour. I've never used it before, but I'm always wanting to try out new (healthy, bonus!) things in the kitchen.
Wow! I definitely want to try these for when I have company over. They look so neat!
Wow, they really do look like twigs! Tasty, tasty twigs. I love anything with buckwheat, so I'll be trying these out soon.
These are going on the menu for this week. Yum! They look so interesting and sound so delicious.
Very Botanical ! I will definitely try these for a gathering of gardening friends... I see lots of variations on this theme. Thank you Heidi. -Michaela
I was only just this morning looking through the flours that I have in my baking cupboard and thinking that I really should make something with the buckwheat, which has been sitting there, unloved, for a while. I think I've I just found the something that I'm going to make. Thank you!
I look forward to your recipe emails every week! These look amazing! I will have to get busy in the kitchen now. Keep up the great work!
Love the look, esp. the marble table top. Thanks!
these look like something my 3 year old can help with, i'll try to make them with vegetable shortening and no cheese to make them vegan for my husband, maybe i'll use some more fresh herbs...
I want to try these. I live in Poland (American ex pat) and Buckwheat is actually a staple here and given to kids even when they are 1 year old. ps your photos are great, they looks very rustic with the background not contrasting with but accenting your buckwheat sticks :)
lovely...I must try these. They look terrific and healthy too...great shots.
I'm sure these are tasty little snacks, but it's their twig like appearance that makes them so appealing. I'm going to try this recipe out myself very soon. Thanks for the idea!
You're right, it does look like orange moss. It's almost gross looking, but I wan to make these now! I've always wanted to make something with buckwheat...Do you know if there is a recipe somewhere for soba noodles?
you are so creative! thank you so much. will definitely be buckwheat flour for the first time for these.
Love these!! I bet they would be a charming autumn centerpiece as well - fun! :)
They look a bit rough-and-tumble. To make, that is! Anything that thin and wispy terrifies me, but I'll pretty much do anything for buckwheat. I think I'll try my hand at these tomorrow.
More Recipes
Weekly recipes and inspirations.
Popular Ingredients