Challah Bread Recipe
Peter Reinhart's challah recipe creates a wonderful (and reasonably forgiving) dough that bakes into a tender, delicious version of the traditional Jewish celebration bread.
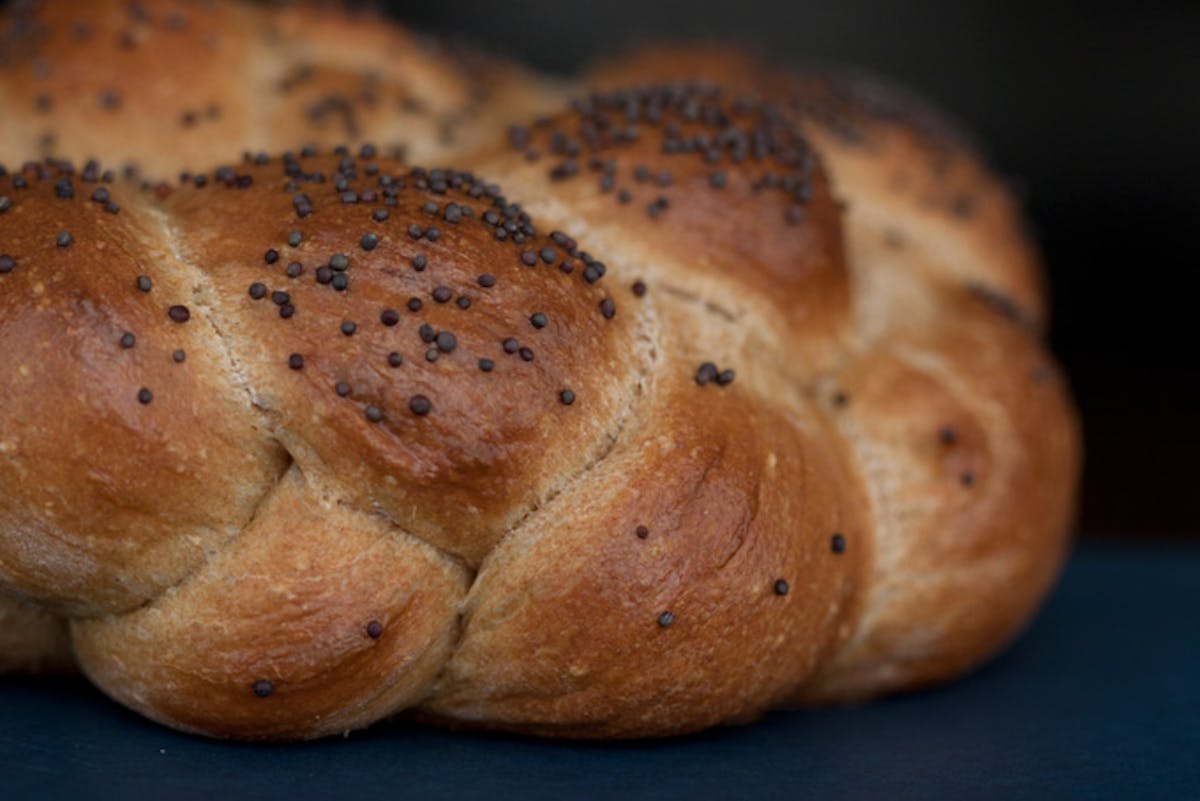
Bread bakers are their own tribe - and while they might not have a secret handshake, I assure you they have a language all their own. Their idea of a window pane is not your idea of a window pane, and words like benching, barms, and bigas pepper their sentences. If you develop an interest in baking bread, chances are you'll encounter the work of bread baking ambassador and baker extraordinare, Peter Reinhart. I've eagerly awaited Peter's new book for months - primarily because of the prior success I've had with breads (and pizzas!) based on his writings and recipes. Look at the challah bread in the photograph up above - how beautiful is that? I take minimal credit. When I follow Peter's lead in the land of crust and crumb, I regularly meet with this type of success. This challah bread recipe is from his new release, Peter Reinhart's Whole Grain Breads: New Techniques, Extraordinary Flavor. Many of you are familiar with Peter's best-selling Bread Baker's Apprentice, it won both the IACP and James Beard book of the year awards in 2002.
One of the most significant aspects of this new book is Peter's introduction (and explanation) of a totally new way of making whole grain breads - he's nicknamed it "The Epoxy Method." I'm not going to get into the finer points of how it works in this post, but for the bread enthusiasts reading, this new technique will take your whole grain breads to new heights - literally. In addition to this new technique, there are other reasons I'm excited about the book...
Whole Grains:
You all know how much I like cooking and baking with whole grains, whole grain flours and the like. This book is full of recipes highlighting and utilizing this palette of ingredients.100%.....or less:
Many of the breads featured in the book are highlighted a couple ways. Peter will include a 100% whole grain flour version of a bread, as well as alternate version that might have a blend of white and whole grain flour, say 50/50.Beginners through breadheads:
It doesn't matter if you've never baked bread before in your life, the recipes and techniques are clearly explained and straight-forward. For more advanced bakers, you'll get the advanced, under-the-hood explanations you are looking for.Photography:
The book has both instructional and and beauty shots. The instructional shots are helpful confidence boosters as you are moving through recipes and techniques and bread types.Getting to know Peter:
In the front of the book Peter talks about how his life, interests, and passions intersected in the realm of whole grain baking. It is one of my favorite sections.
I asked Peter if he had a favorite recipe from the book and he mentioned the spent grain bread he made recently for a Slow Food dinner (the recipe is included in Whole Grain Breads). It requires tracking down some spent grain from a local micro-brewery, but for you die-hards, it sounds worth the effort. He used spent grains from a batch of Irish Stout and noted the malty flavors were hard to beat. This spent grain bread is on my list to try, but I also have his potato rosemary bread, the Vollkornbrot, and the seeded crackers in my cross-hairs.
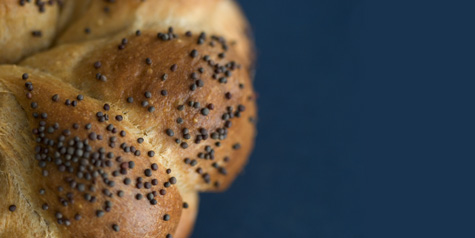
Peter's challah recipe creates a wonderful (and reasonably forgiving) dough that bakes into a tender, delicious version of the traditional Jewish celebration bread. Though I don't know much about the ritual and tradition surrounding challah bread, I've always been captivated by the intricate braiding. Going into this recipe I felt wildly ambitious and was determined to try a 6-strand braid.....let's just say I'll have to practice a few more times using something other than dough before I'm ready to graduate to anything more than a three strand braid.
Challah Bread Recipe
This is the transitional version of the 100% whole wheat challah included in the Peter's Reinhart's Whole Grain Breads. It is a blend of whole wheat and white flours, and takes two days to make - not all active. There are three major components (soaker, biga, and final dough).
Time commitment:
Day 1: Soaker and biga, 20 minutes set up and mix; overnight
Day 2: 2 hours to de-chill biga; 12 to 15 minutes mixing; 2 to 3 hours fermentation, shaping, and proofing; 40 to 60 minutes baking.
PART ONE: THE SOAKER
1 3/4 cups (8 ounces) whole wheat flour, preferably fine grind
1/2 teaspoon (.14 ounces) salt
3/4 cup (6 ounces) water
1. Mix all the soaker ingredients together in a bowl for about 1 minute, until all of the flour is hydrated and the ingredients form a ball of dough.
2. Cover loosely with plastic wrap and leave at room temperature for 12 to 24 hours. (If it will be more than 24 hours, place the soaker in the refrigerator; it will be good for up to 3 days. Remove it 2 hours before mixing the final dough to take off the chill.)
PART TWO: THE BIGA
1 3/4 cups (8 ounces) unbleached bread flour
1/4 teaspoon (.03 ounces) instant yeast
7 tablespoons (3.5 ounces) filtered or spring water, at room temperature (about 70F or 21C)
1 large egg (1.65 ounces), slightly beaten
4 egg yolks (2 ounces)
1. Mix all of the biga ingredients together in a bowl to form a ball of dough. Using wet hands, knead the dough in the bowl for 2 minutes to be sure all of the ingredients are evenly distributed and the flour is fully hydrated. The dough should feel very tacky. Let the dough rest for 5 minutes, then knead it again with wet hands for 1 minute. The dough will become smoother but still be tacky.
2. Transfer the dough to a clean bowl, cover tightly with plastic wrap, and refrigerate for at least 8 hours a day and up to 3 days.
3. About 2 hours before mixing the final dough, remove the biga from the refrigerator to take off the chill. It will have risen slightly but need not have risen significantly in order to use it in the final dough.
PART THREE: THE FINAL DOUGH
Use all of the soaker
Use all of the biga
7 tablespoons (2 ounces) whole wheat flour
1/2 teaspoon (.14 ounces) salt
2 1/4 teaspoons (.25 ounces) instant yeast1 1/2 tablespoons honey or agave nectar (1 ounce) OR 2 tablespoons or sugar or brown sugar (1 ounce)
2 tablespoons (1 ounce) vegetable oil
- extra whole wheat flour for adjustments
- 1 egg beaten with 1 tablespoon water plus a pinch of salt for egg wash
- poppy seeds or sesame seeds for topping (optional)
1. Using a metal scraper, chop the soaker and the biga into 12 smaller pieces each (sprinkle some of the extra flour over the pre-doughs to keep the pieces from sticking back to each other).
2. If mixing by hand, combine the soaker and biga pieces in a bowl with the 7 tablespoons flour and the salt, yeast, honey, and vegetable oil. Stir vigorously with a mixing spoon or knead with wet hands for about 2 minutes, until all of the ingredients are evenly integrated and distributed into the dough. The dough should be soft and slightly sticky; if not, add more flour or water as needed. If using a stand mixer, put the pre-dough pieces in the bowl along with the 7 tablespoons of flour and the salt, yeast, honey, and vegetable oil. Mix on slow speed with the paddle attachment (preferable) or the dough hook for 1 minute to bring the ingredients together into a ball. Switch to the dough hook if need be and mix on medium-low speed, occasionally scraping down the bowl, for 2 to 3 minutes, until the pre-dough becomes cohesive and assimilated into each other. Add more flour or water as needed until the dough is soft and slightly sticky.
3. Dust a work surface with flour, then roll the dough in the flour to coat. Knead the dough by hand for 3 to 4 minutes, incorporating only as much extra flour as needed, until the fought feels soft and tacky, but not sticky. Form the dough into a ball and let it rest on the work surface for 5 minutes while you prepare a clean, lightly oiled bowl.
4. Resume kneading the dough for 1 minute to strengthen the gluten and make any final flour or water adjustments. The dough should have strength and pass the windowpane test, yet still feel soft, supple, and very tacky. Form the dough into a ball and place it in the prepared bowl, rolling to coat with oil. Cover loosely with plastic wrap and let rise at room temperature for approximately 45 to 60 minutes, until it is about 1 1/2 times its original size.
5. Gently transfer the dough to a lightly floured work surface with a plastic bowl scraper (try not to rip or tear the dough). You can make 1 large braided loaf or 2 smaller loaves, or you can cut as many as 16 smaller pieces for dinner rolls. For braided challah, use a metal pastry scraper to cut the dough into 3, 4, 5, or 6 equal pieces, depending on the type of braid you want to make; do not rip the dough - make clean cuts. Roll the pieces into short ropes about 3 inches long. Cover loosely with a cloth towel or plastic wrap, let rest 5 minutes, the roll each piece into a longer rope, about 10 inches long. (heidi note: I made 2 loaves made from standard 3 piece braids, you will need to reference the book to learn the more advanced braiding, to understand 3 piece braiding reference the end of the recipe).
6. Place the braided loaf on a sheet pan lined with parchment paper or a silicon mat. Brush the egg wash on the loaf, mist the top of the dough with pan spray (optional), and cover loosely with plastic wrap, or place the pan in a plastic bag. Let the dough rise at room temperature for 30 minutes.
7. Brush the dough with egg wash a second time, then top with poppy seeds or sesame seeds. Leave the dough uncovered to continue rising for 15 more minutes. Preheat the oven to 400F (204C).
8. Place the challah on the middle shelf, reduce the heat to 325F (163C), and bake for 20 minutes. Rotate the loaf 180 degrees and bake for another 20 minutes. Check the bread and rotate again if it is baking unevenly. Continue baking for an additional 10 to 15 minutes, until the bread is a rich brown all over around, sounds hollow when thumped on the bottom, and registers at least 195F (91C) in the center.
9. Transfer the bread to a cooling rack and let it cool for at least 1 hour before serving.
Other notes: If you make smaller breads or rolls from this dough, increase the oven temperature by 25F (14C). larger loaves take longer and need to bake more slowly, but because rolls and mini loaves bake quickly, they can be baked at higher temperature.
Three-piece braiding: Lay three equal strands side by side. Start by overlapping one of the outside strands over the middle strand. Take the opposite outside strand and lay it over the new middle strand. Continue this pattern until you run out of dough. Pinch the end closed. Rotate the loaf 180 degrees and repeat the pattern.


Comments are closed.
Apologies, comments are closed.
Comments
wow looks great i live on a farm and have to make all mty own bread more recipes will be appriciated
wow looks great i live on a farm and have to make all mty own bread more recipes will be appriciated
wow looks great i live on a farm and have to make all mty own bread more recipes will be appriciated
OK, that’s WAY too much trouble for a bread that’s made at home every week. Sheesh! The challah recipe I use takes all of about 5 hours from start to finish including fermentation and although it’s not whole grain, it beats the heck out of anything you can buy in a store…
This looks really yummy… I will have to try it if I can work up the courage. I am still skeptical of making my own bread. Your “Whole Wheat Pizza Dough” was so easy and turned out great, but I suspect this is more complicated. Any sugguestions on what I could make to work my way up from pizza dough to callah bread? Thanks.
Your bread looks amazing.
I love love love Challah! I eat it almost every Friday night 🙂 Thanks for this entry!
Bread recipes intimidate the heck out of me. I think it has to do with the whole yeast thing and the kneading. Am I kneadng too much? Did I destroy the yeast??? OH MAN…but I will try this one. Wish me luck!
“If you’re baking a large batch (4 or 5 pounds) a barucha (blessing) is said before removing the piece of dough. The reason we call the bread we eat challah as well is simple etymology”
i believe it’s the other way around. Hallah is a generic word for loaf.
“They don’t call Israel the “Land of Milk and Honey” for no reason. ;)”
this type of egg bread first began to be baked in europe not israel.
You’ve been given some wonderful tips on how to do the six-stranded braid for the next time you make Challah, so I’ll skip being redundant.
Worth noting on the recipe, if you’re interested in staying traditional, use honey instead of sugar or agave nectar. They don’t call Israel the “Land of Milk and Honey” for no reason. 😉
Also, if you feel up to being a wealth of useless trivia… Challah, rather than actually being a word for bread, is a mitzvah in the Torah that tells us to separate a portion of dough from every batch we make for the kohanim in the days of the Temple. Today, as there is no Temple, we continue to take challah (separating it from the dough, raising it above our heads and declaring it as challah) and dispose of it respectfully (either by wrapping it carefully so it does not come into contact with any other trash, or by burning it in an empty oven – my Nana used aluminum foil, being more environmentally minded, I use a specific glass baking dish, so it comes into contact with nothing else in the oven). If you’re baking a large batch (4 or 5 pounds) a barucha (blessing) is said before removing the piece of dough. The reason we call the bread we eat challah as well is simple etymology.
Challah rocks, we buy it every friday night for sabbath. Even though im not really that religious the idea of having a proper 3-4 course meal once a week is great to keep the family together.
You dont have to make it, you can buy it at a local jewish bakery…probably will be able to do a much better job (unless you work at it for some time).
This bread looks and sounds delicious! Something that I definitely want to attempt to make once the weather cools down.
I made a challah bread ages ago, but I don’t recall that it had this many steps. It sounds like a fun project… and nothing smells better in your house than freshly baked bread!
Heidi, I am intrigued by this whole grain recipe. I make challah every Friday but I use a no fail easy recipe. I always make two-one to give to friends and one to eat with my family. I never thought I would master 6 braiding but it’s really much easier than I imagined. Here are my simple instructions:
To braid:
Pinch six strands together at the top.
• Outside right strand over 2 toward the middle
• 2nd from left to far right
• Outside left over 2 toward middle
• Second from right to far left
Repeat until done and pinch ends together well.
BTW, the braiding of challah is a subject all to its own but most people agree that it symbolizes some of the commandments in the Old Testament.
Wonderful! It’s one of my favorite breads…
Challah’s one of the few things my mother bakes (well, used to before she went no-carb). I’ve never tried whole-grain challah. I’ll have to make it next shabbat. Thanks!
That looks amazing, Heidi. I love making challah and have an ABM recipe for the dough that I use with success. I will try this longer method and see what I think. I love Peter’s books too. His recipes are wonderful.
Thanks for the great review.
I can’t wait to get this book. I’m glad I have a recipe to try before the book arrives. Have you made anything from the KA flour whole grains baking book? Another great book, everything I’ve made has come out fantastic.
Are there any adjustments for high altitude I should know about before attempting this bread???
Here are instructions on the 6 strand challah braid
Wow this looks great. I love challah and especially with whole wheat. Thanks for posting this!
You can also cheat a little on the six-strand by making one big three-strand braid and one little three-strand braid. Brush the big braid with a little water, lay the little braid on top, et voila. Not only does this look amazing, but it adds a nice bit of height to your challah.
Queit,intresting pls.keep me posted,as a young, man trying to know much about good recipes before marring. Thanks.
I grew up eating homemade, organic whole grain bread, and I’ve yet to come across any better bread then what my mother made. Your image of the poppy seed speckled challah, reminded me of her seeded whole wheat pull apart rolls, and definitely sold me on Peter’s new book. thank you!
Just tried your Pizza dough recipe yesterday. Turned out to be quite good :). I’ll try this one also soon.
A minor thing: there’s a typo in the “Beginners through breadheads” paragraph – “explainations”
it’s hard work to bake such yummy bread~
Thank you for the detailed recipe and instructions.
I have linked to your entry in posts to two food forums where I am a member.
The first is http://www.thefreshloaf.com, an excellent and friendly forum for dedicated home bread bakers.
The 2nd is this thread on whole grain bread at discusscooking.com Collaborative bread thread for whole wheat/multi-grain/whole grain breads
Hope you get a lot of hits 🙂
I think there’s a YouTube video on how to 6-braid challah. http://is-that-my-bureka.blogspot.com/ had the link to it a month or so ago–I could never remember exactly how to do it either. Normally I’m with whoever said it shouldn’t take two days–then again, the traditional challah recipe is white flour, where just the right amount of excessive kneading is what makes the dough feathery. The extra rise time here may help digest the whole wheat and make it more elastic. Raisins or aniseed are also good mix-ins for challah.
Wow, that looks terrific! We were just at a Shabbat kid-oriented picnic in Seattle with a few dozen families and several folks brought home-baked challah, which was fantastic. What a treat to get to taste several at once. As far as trying out your braiding technique without investing real dough, you can use playdough (either storebought or homemade). When mini-me and I are playing with playdough in the morning, I often practice making pasta shapes :)!
Michael Natkin
The Vegetarian Foodie Blog
Hello Heidi,
I am trying to send an e-mail to your e-mail address, or to reply to the one that you sent me, and it keeps being returned. I’m not sure why. I would like to let you know that I have added the blogroll to my blog.
Thanks so much … Anne
Thank you so much for posting this. I have been eagerly waiting to get my hands on a copy of this book and your endorsement piques my anticipation even more. The challah looks wonderful!
I love baking with whole grain too. I planned on making challah this week so I’m glad I found this recipe.
I love baking with whole grain too. I planned on making challah this week so I’m glad I found this recipe.
Heidi, the 6-strand braid is no sweat as long as you have a diagram at hand. The trick is to assign a number to each strand and to keep track of their new number designations after each step. The results are worth it! When serving challah at Shabbat dinner (or any other holiday) we often have many people present, and each person must receive a piece of bread at the start of the meal, so to save time and effort you can always make a pull-apart loaf (made from little balls of dough arranged in a cake pan). It looks like a pretty flower, is fun to rip apart, and is fantastically easy to do. For a real treat, join a friend for a meal at Rosh Hashanah (the new year) when the traditional challah is sweetened with honey and raisins to bring a sweet new year.
I cannot wait to hear about the Vollkornbrot!
I’ll have to look for this book. It sounds like a winner. But the challah? I don’t know. I always tell people that challah is the easiest, most forgiving bread in the world. This does look wildly complicated. One (or two) of these days I’ll have to give it a try and see how it compares to the version we use around here every Friday.
Heidi,
This bread looks incredible! It reminded me of a very fond college memory. A friend once came to visit my dorm room late in the afternoon on a gray, miserable day. He had several slices of warm challah for me. I was having a horrible day and the bread was a great “pick-me-up.” It put a smile on my face and comforted my heart.
For me, bread is the ultimate comfort food, because there is comfort in the making and comfort in the taking.
In Italy, they have a saying that when someone is a genuinely good person, they are “buono come il pane,” or good as bread. I could not agree with this statement more as the people I cherish most in my life have proven themselves to be as good as bread. Cheers.
-f
Yeah, I’m definitely peeking into another world by reading this post, a land of bigas and windowpane tests…and I think it’s intriguing. Given my current level of ability I doubt I’ll be making much bread anytime soon, but thanks for opening my eyes to the possibilities!
I had the pleasure of making the spent grain bread under Peter’s tutelage at the IACP conference in Chicago last April. He was a great teacher with so much enthusiasm; I’ve been eagerly awaiting this book for my own shelves and for my breadhead brother.
The spent grain bread is so delicious–this is worth tracking down a source for the grain, trust me!
The spent grain bread intreages me. As an avid home brewer, I think I’m going to have to find a copy of this book. Most recipe’s I’ve seen for this haven’t looked so good, but I imagine Peter knows what he is doing!
One easy way to track down spent grains is contacting a local home brewer. Ask at a local home brew shop or club. There are tons of folks brewing on the weekends all over the country.
Heidi, I’ve been eagerly awaiting the arrival of this new Reinhart book, so it’s great to get a glimpse of what’s inside. The challah looks lovely! My mother used to make a whole wheat version for Easter, but I suspect that Reinhart’s version is a little more refined than hers (with all due respect).
To Sophie and others who may be reluctant to take on a recipe like this because of the time commitment, I’ve found that working on the bread a little at a time over a couple of days is much more relaxing (and yields far tastier results) than trying to do it all in one day. Really, give this or another multi-day bread recipe a try!
Another great post, congrats!
It’s wonderful but, sorry, I can’t understand why you use instant (chemical) yeast instead of live yeast.
Here in Italy all “fornai” (bread bakers) are allowed to use only live yeast, either dried (beer yeast) or fresh. Chemical yeast is used here only making cakes or pastries, when rich in fats or otherwise critical to leaven.
Ciao, F.
This looks lovely (and very like the milk plait with poppyseeds we would get from our local bakery when I was at school). Heidi, I’m really glad you put the time committment at the top of the recipe – it’s good to know what you are getting yourself in for up front!
What a wonderful recipe. So yummy. And your photo is amazing. Je suis sous le charme !
Comments are closed.
Apologies, comments are closed.
More Recipes
Weekly recipes and inspirations.
Popular Ingredients