How to Whisk Egg Whites Recipe
If you are looking to learn how to whisk egg whites properly, there are few better teachers than Madame E. Saint-Ange. The most meticulous intructions you are likely to find on the topic.
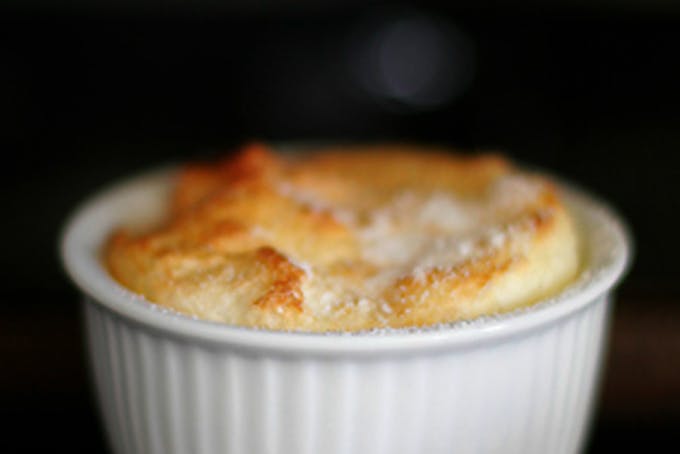
To properly whisk egg whites we turn to Madame E. Saint-Ange. La Bonne Cuisine, the newly-released English language version of her classic cookbook also includes Madame's meticulous souffle making techniques.
For the entire write-up that goes along with this recipe you will want to start here. This will give you a bit of back-history and context for Madame Saint-Ange's book. This is hands down the most detailed instruction you are likely to find on the subject of how to whisk egg whites.


Premium Ad-Free membership includes:
-Ad-free content
-Print-friendly recipes
-Spice / Herb / Flower / Zest recipe collection PDF
-Weeknight Express recipe collection PDF
-Surprise bonuses throughout the year
How to whisk egg whites the Saint-Ange Way
Imagine this scenario, which could occur in any number of houses possessing kitchen equipment that is otherwise quite respectable. Madame demands, in vain, that her oven produce souffles as well risen as those at her favorite restaurant, or Mademoiselle wants to amuse herself making cookies and meringues but they are completely unsuccessful.
If, in these houses, anyone had seen egg whites whisked by a professional, they would have understood the significance of the term "firm snow peaks... It would have been obvious why egg whites, beaten carelessly, in a salad bowl, with a fork, could never have become firm enough to be capable of supporting the weight of an egg in its shell. They would also have understood why, even if they had succeeded in whisking the eggs properly, or nearly, the egg whites would have gone grainy. (That's the professional term.) The egg white that goes grainy divides, like a cream that curdles, into one part liquid, another part millions of little wet lumps, instead of retaining the firmness of a batter. When beaten to the consistency of "firm snow peaks;' egg whites appear more like a batter than a mousse.
To achieve this result, otherwise known as success, three conditions must be fulfilled: The purity of the egg whites, the use of appropriate utensils, and the technique of the endeavor.
The egg whites: Their perfect purity is a pre-requisite. The most experienced professional would never manage to whisk egg whites properly if they had retained the least bit of yolk, or if they had been put into a greasy receptacle. Thus it is essential to take great care and avoid any contact with a greasy substance or object. It should be noted that the yolk is particularly oily.
As for freshness, it is not very important. We could even say, for the benefit of those who might hesitate to use egg whites that are several days old, that they are whisked more easily and remain firmer than whites separated from their yolks just before being whipped. However, they must be kept cool and covered. These whites are less subject to going grainy - in other words, decomposing.
The utensils: A copper bowl, which is not lined with tin and which is made uniquely for whisking egg whites, is practically mandatory. Alternatively, you could use an aluminum bowl whose interior surface has been anodized so that the whites don't discolor. In any other receptacle - enameled, stoneware, porcelain - you run the risk of seeing the whites go grainy. In any case, if you have none of these utensils, you must at least have a bowl in the shape of a hemisphere and without an angle at the bottom, and one that is big enough to allow the whisk to work easily.
Moreover, cakes and biscuits made with a batter containing beaten egg whites, prepared in a copper bowl, yield one third more volume. They are not only more attractive prepared this way, but they are much lighter and fluffier. One egg white yields almost 1 1/2 deciliters (5 fluid ounces, 2/3 cup), while in its natural state it consists of only 3 1/2 centiliters ( 1 3/16 ounces). Of course, this assumes the use of the copper bowl.
Upkeep of a copper bowl is simple. Before using this preferred utensil - assuming it is not used daily - wipe the inside with a little vinegar and salt, or rub it with a lemon wedge, which will leave it perfectly clean. It is not necessary to buff it with anything else, even for major cleaning. Right after use, it will be enough to wipe off the bowl with a clean, dry kitchen towel. Be equally careful to keep the outside of the bowl clean, because if you don't, your hands will acquire an odor of copper when you handle the bowl, and this will be passed on to everything you touch afterwards.
Along with this copper bowl, you must have a large whisk with very thin wires made of tinned steel (or stainless steel) that should only be used to whisk egg whites. Otherwise, you must wash the whisk in boiling water and rub it with vinegar or lemon before using it again. It's really better to restrict its use to whisking egg whites. Choose one with a wooden handle. This is much less tiring than a metal handle. It should be big enough and strong enough, about 40 centimeters (16 inches) from the end of the handle to the end of the wires. A small sauce whisk is much too weak for this job. Using mechanical beaters makes the work much less tiring.
Technique: We will split the whisking of egg whites into two parts. The first covers the disintegration of the mucous mass up to the point when it becomes a grayish, roundish mass. This part requires mixing with an easy and rhythmic effort. The second part covers the conversion of the round, gray mass into a smooth, light, firm, stunningly white batter. This second part, unlike the first, requires a very vigorous and accelerated effort.
During both these periods, the whisking, even though different in strength and speed, must not be interrupted. Under no circumstances should you stop once you have begun to whisk. Stopping causes the whites to disintegreate. Instead of rising and firming up more and more, their mass will remain semi-solid and will take on a blotchy, grainy look.
Since this job is rather difficult during the second part, it's a good idea to take turns with another person. Or, if you have the necessary staying power, switch the whisk to the other hand (this is how professional pastry chefs do it) so you can rest your arm while the other one works.
The process: As already explained, wipe the inside of the bowl and the wires of the whisk with a lemon wedge, or with a little vinegar and salt. Dry them with a clean towel. Take a dishtowel, twist it up from the corners, loosely, then arrange it on the table in a circle, like a turban or little crown. Place the bowl in the center of this crown, tilting it a little toward you. Rolled like this, the towel serves to steady the bowl and keep it on the table. Without this, the instability of the rounded bottom would make the work more difficult and slower.
Put the whites in the bowl. If you break the eggs directly into the bowl, be careful when you have separated the yolks to run your thumb, which should be scrupulously clean, around the inside of the shell to remove all of the white. Make sure that not even the slightest bit of yolk has fallen into the bowl. Should that happen, use a bit of eggshell to carefully remove it.
Begin to whisk, in any direction, but not too hard, and not too high. You must beat with very small strokes, quietly, barely lifting the whisk, which must stay in contact with the whites. Nothing but a little movement in place, without splashing, without noise, in a steady rhythm. Little by little, the mucous mass dissolves and liquefies. The globules shoot up, and everything condenses into a huge foam with an unattractive grayish color.
It is exactly at this moment that the movement of the whisk must, gradually, increase in breadth,
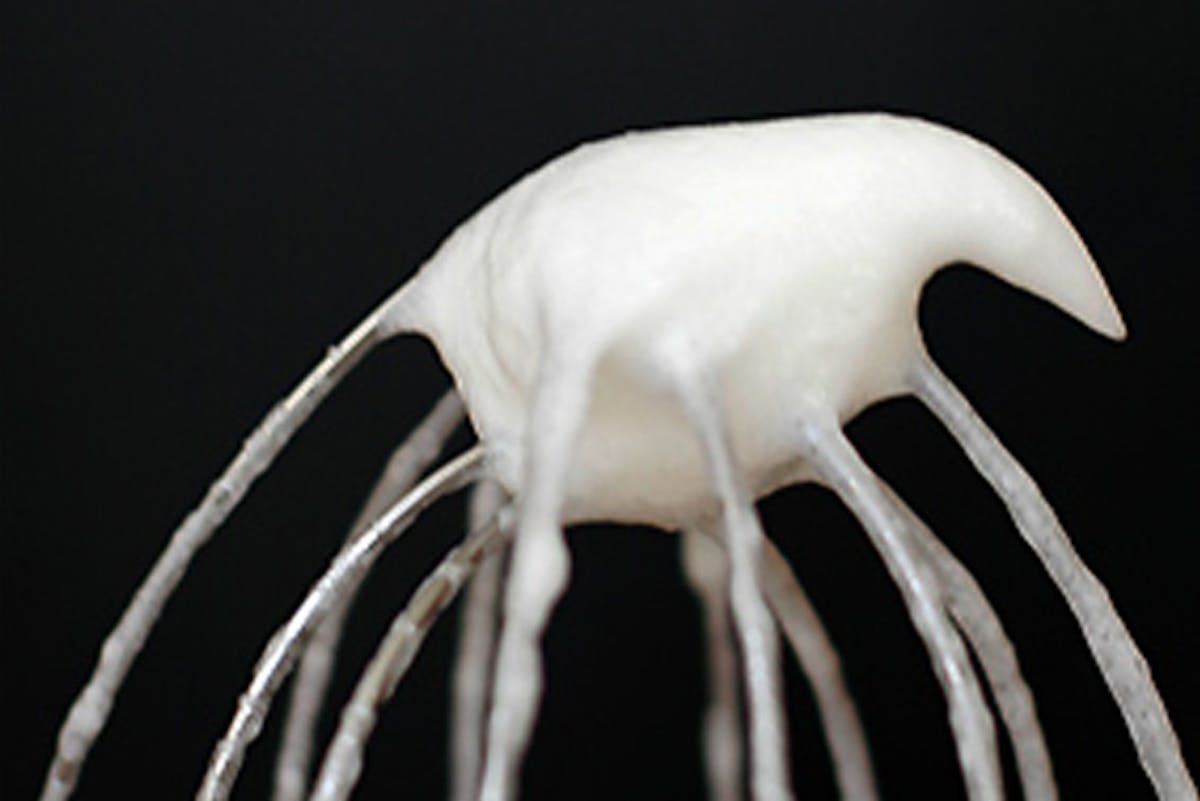
in power, in speed. You will see, little by little, the foam will begin to swell more, become more homogenous, and whiten. Do not stop for a second. Continue to beat with larger and larger strokes, faster, more vigorously, until the foam, constantly increasing in volume, becomes absolutely smooth, like whipped cream, a stunning white in color with a very firm consistency. To gauge when it has reached the correct consistency, take the whisk out of the bowl and turn it over. The foam should stay attached in a solid block, forming a tassel, like that on a clown's wig.
However, do not spend too long on these observations, given that the whites must always be used as soon as they are whisked, otherwise they might become grainy. Since they can be worked beyond the right point without spoiling, you can, should you want to, give them a couple of extra strokes, to be certain that they are completed adequately.
NOTE. When the preparation that the whites are intended for contains sugar, you can add a bit of powdered sugar to the whites, if you think they might go grainy, but only toward the end of the process. Be sure to continue whisking vigorously when you do this. Use about 20 grams (2/3 ounce) for 5-6 whites. This addition of powdered sugar gives cohesion and consistency to the whisked egg white.
Incorporating the whites: Once you have beaten the whites into a firm and robust state (neige ferme), you are still far from done. In order for this result to be maintained in the final preparation, the whites must remain in this state after they are incorporated.
Cookbooks and recipes always recommend proceeding with this mixing "with caution, so you don't flatten the whites." Yet, it is rare that the method for doing this is explained, even though people who are uninitiated in the professional secrets of the kitchen would never discover it by themselves. In reality, it is quite simple.
First of all, you should have a wooden spatula, thin and wide. Or, lacking that, a stiff card, like a large business card. If we are dealing with a substance heavier than the whites-for example, a mixture for a souffle, rice or semolina for a pudding, or cake batter - proceed as follows:
With the spatula, spread the whites on top of the material to which they are to be incorporated. Cut into the whole mixture with the spatula, so that you pass under the mass, turning it and placing it over the whites. In other words: Put the spatula straight through the middle of the whites, right to the bottom of the bowl, just as you would to cut a slice of a Saint-Honore pastry. Having reached the bottom, push the spatula underneath the mass and take up as much as you can carryon the spatula. Deposit all of this on top of the whites, to your right. With your left hand, turn the bowl from left to right, just as you would do with the plate that holds the Saint-Honore. Once again, dive in with the spatula, just as you would to cut a slice of cake, to the left of the previous insertion. Once again, lift and place on top the mixture that was underneath. This movement of placing the mixture from below on top is the only technique that you should use. And you must do this with large, generous gestures, measured yet swift, going out from the middle to the edges, continually turning the bowl on the table. Any other kind of movement would flatten the whites by expelling the air they have absorbed. Furthermore, it would prevent them from rising properly when cooked.
When the whites are to be mixed with a substance lighter than them, for example, some flour or ground hazelnuts or almonds, powdered sugar, etc., you proceed with exactly the same motion, but reverse the positions. In other words, in this situation, you put the whites underneath and the lighter substance above. The whites should be left in the copper bowl for this. You sprinkle the flour or sugar on top of the whites, adding more flour or sugar gradually as you slice into the mass to put it on top of the added flour.
Comments are closed.
Apologies, comments are closed.
Comments
This is great – but I find her admonition ‘Do not stop for a second’ vaguely terrifying! I had never thought about whisking in a different way as the foam increases. I can testify to the effects of a copper bowl though – not only to you get a really good volume, it seems to be much more stable and resistant to going grainy. One day, I’ll get one of my own!
Comments are closed.
Apologies, comments are closed.
More Recipes
Weekly recipes and inspirations.
Popular Ingredients