All-Butter Flaky Pie Crust
Most pages about pie crusts are going to point you to their “best ever” pie crust, but I’m taking a slightly different approach. I’m going to share a few of the inspirations that have impacted my pie baking over the years along with the pie dough recipe I currently use and love. Pie baking is a journey, and there are a few places I’d recommend jumping on or off along the way.
For a long time I used a different method for making pie dough than the one I’m going to share today. The process was all by hand, there was a lot of smearing and folding, and it was great - beautiful pie crust every time. This was in San Francisco where my kitchen tended to stay quite chilly. Summer temperatures rarely cracked 60°F. It was a pie makers dream - cold marble countertops year round.
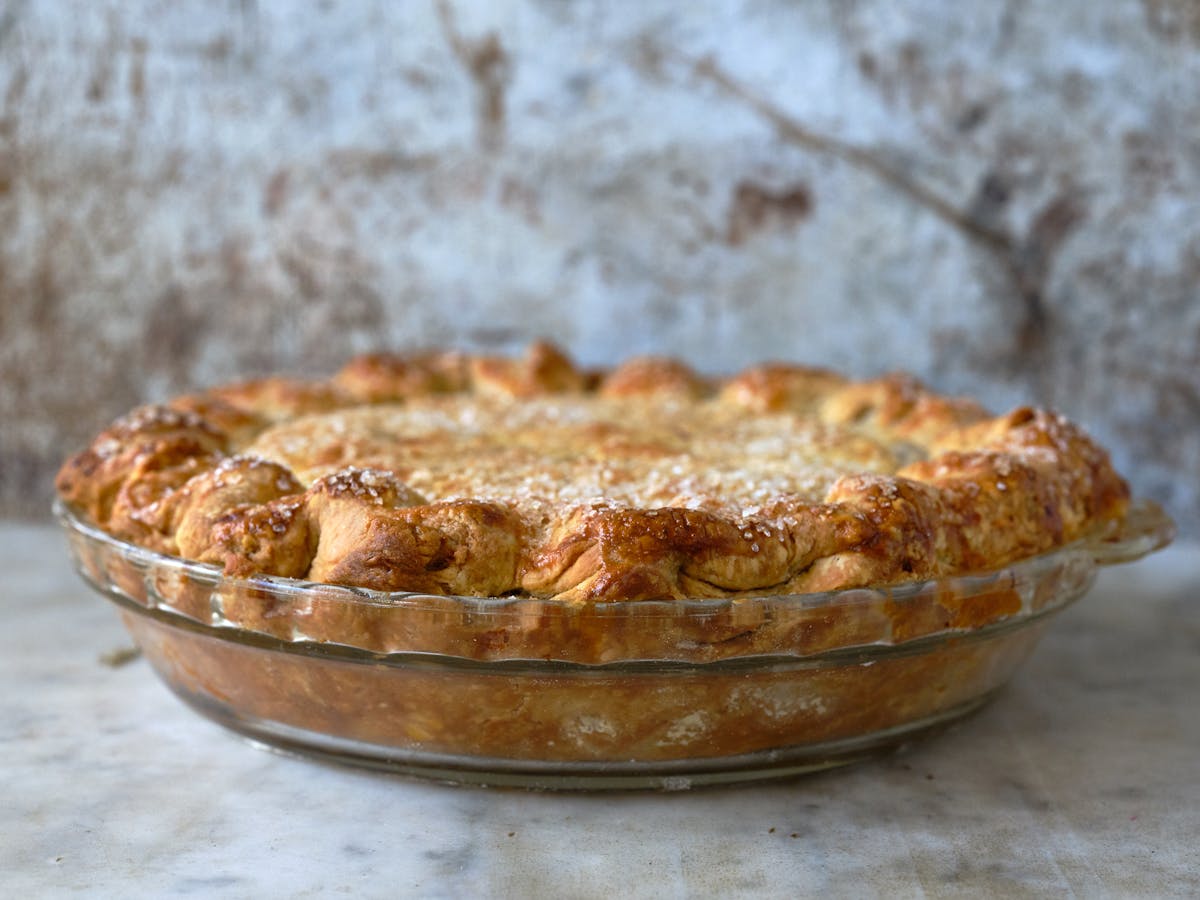
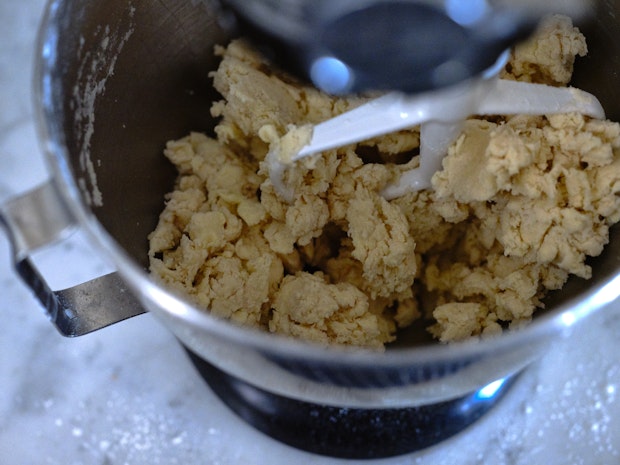
I’ve had to switch up my game since living in Los Angeles. My kitchen is always too warm, and when it comes to pies, I was struggling a bit. I’ve since realized the less I touch the pie dough in the process of making it, the better. So, here we are. This is my go-to pie crust these days. It’s a mash-up of everything I’ve learned about pie dough over the years and delivers a beautifully golden, super flaky, all-butter pie crust. It’s easy to make, I use my electric mixer with the paddle attachment to smear butter into flour quickly, and it makes less of a mess than doing it all on a countertop (which I still love to do on occasion).

Pie Dough: Details & Inspiration
My goal in this post is to provide you with direction that will result in you feeling more confident making pie dough and beautiful pie crusts. Or, if you already feel confident, perhaps you’ll learn a new technique. Every cook needs a great go-to pie dough recipe, one you love and can use across a wide range of pies in your life. For a long time, and while living in San Francisco I often used Pim’s One Pie Dough To Rule Them All, inspired by Judy Rodgers and the The Zuni Cafe cookbook. I still love this dough. For many years, I used it as a jumping off point, often playing around with different types of flour ratios, introducing rye flour, or farro flour, or semolina. If you want to make a beautiful pie crust 100% by hand and have a bit of time for the fold and chill series - this recipe and technique will do you right. It disappears from the internet now and then, but seems to be here pretty reliably.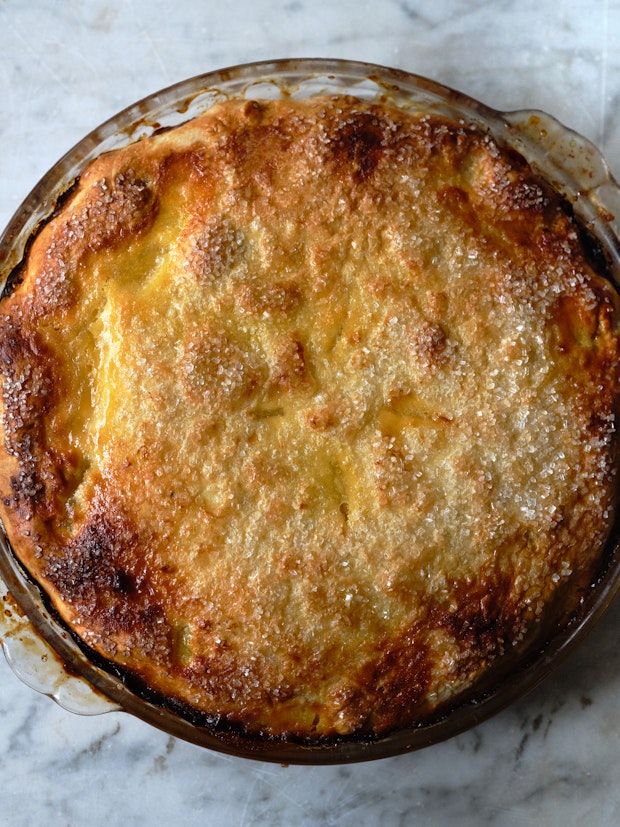
When I came to Los Angeles, I met Nicole Rucker. She’s a force. She’s queen of the pie scene (and so much more!) and her pies are everything I want - technicolor flavor, juicy and bubbly, with shatteringly flaky, rustic, butter crusts. And so golden. The color of her crusts are swoon-worthy. She wrote a book in 2019 (Dappled: Baking Recipes for Fruit Lovers) and her approach to pie crusts caught my attention. There were two techniques that Nicole used that were unusual. She added a bit of vinegar to her pie dough. She also diluted her sugar into a hot water and vinegar solution, chilled it, and proceeded with the dough from there. Here’s what she says:”the addition of vinegar adds a layer of tenderizing magic that shortens the production of gluten strands.” And by incorporating the vinegar into the hot sugar mixture, you’re creating a syrup that thoroughly permeates the dough. Double win.
In Dappled, Nicole has you make her pie dough on a counter top. It tends to be so warm where I am, and we rarely use air-conditioning, so I’ve been incorporating Nicole's wet sugar and vinegar move, but use my electric mixer with the paddle attachment to make quick work of things. To be honest, I haven’t looked back. The paddle attachment does a fine job of smearing the chunks of butter into the side of the bowl. I drizzle just enough icy liquid into the flour and butter, as the mixer is running, and everything quickly comes together. Then just a quick shape, wrap, and chill before it’s all set to roll out and assemble the pie. The recipe and technique included below is my current gold standard. It’s unfussy, contains the kitchen mess to one bowl, and delivers a banger of a pie crust. I’ll break it down into basics.
Electric Mixer vs. Food Processor for Pie Crusts
A lot of people use a food processor to cut the butter into the flour in their pie dough. It actually does a great job of this. That said, I like to use the stand mixer better. I feel like it is gentler and better mimics the motions of making pie dough by hand. The electric stand mixer smears and tumbles the flour and butter, it isn’t cutting and slashing the way a food processor does. And because of this it seems to leave more long thin pockets of butter in the dough as you roll it out resulting in a tender, shard-y crust that crackles as you slice into it.
Basic Pie Crust Steps
- Mix sugar, vinegar, and salt into hot water and chill.
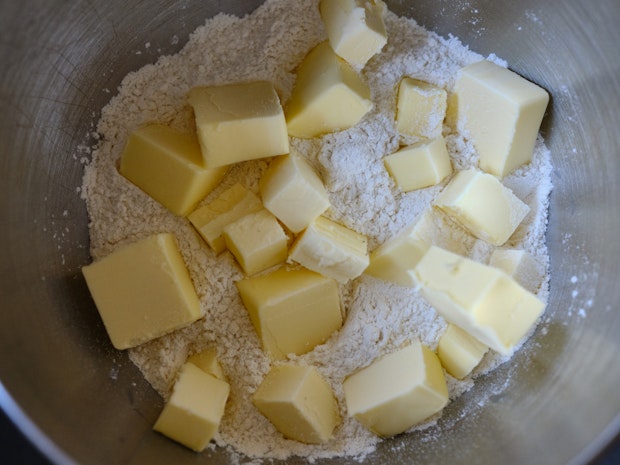
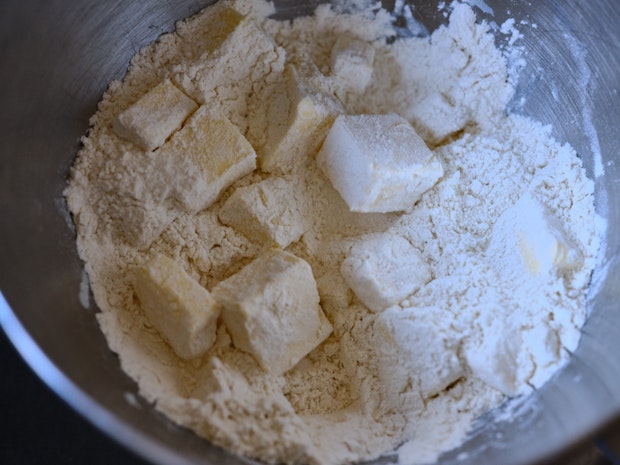
- Smear butter cubes into flour using electric mixer with paddle attachment.
- Slowly drizzle chilled water mixture into dough until it comes together.
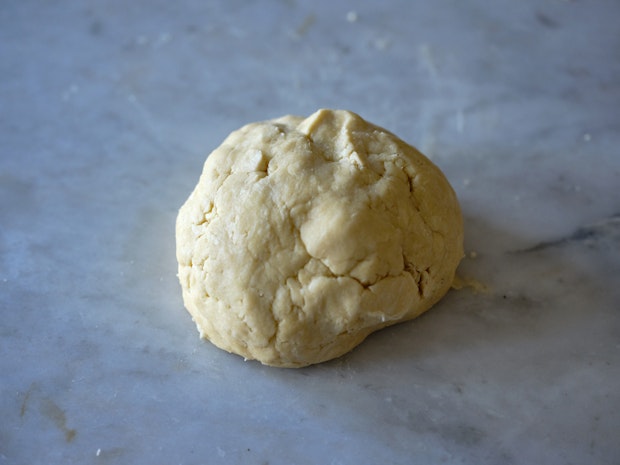
- Mold pie dough into ball.
- Cut in half. This recipe yield two 9-inch crusts.
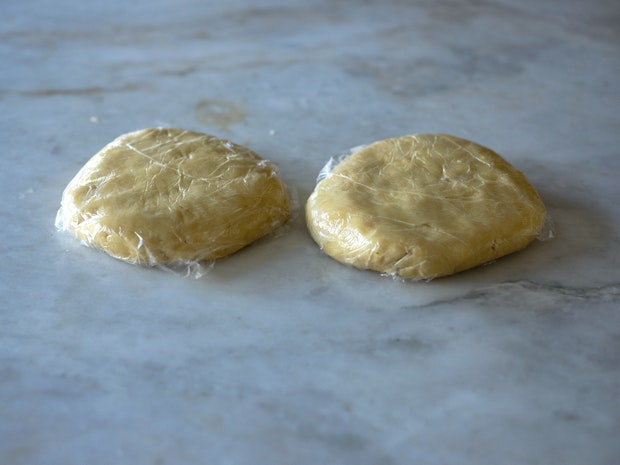
- Flatten into discs and wrap in plastic wrap.
- Chill for 2 hours before using.
What type of vinegar to use in pie crust?
The short answer is: one that tastes good. I’m including a list of vinegars I tend to reach for when I’m making crusts like this. Most often it’s a great tasting white wine vinegar, but I like to play around.
- Apple cider vinegar: Reliably good, apple cider vinegar is something a lot of people keep on hand, and it works well in pie dough.
- Katz Late Harvest Sauvignon Blanc Vinegar (agro-dolce) 5.5% acidity: first choice for pie crust related vinegar in my kitchen.
- Camino Red Wine Vinegar: I don’t always grab this one for pie crusts, but I have, and you should grab a bottle if you can. It’s wonderful, and makes everything it touches more wonderful. You should just know about it in general.
- TART Lavender Vinegar: For a whisper of lavender in your crust this is the way to go. Or to reinforce lavender notes in your filling. For example, I baked a Shaker lemon pie using TART Lavender Vinegar in the crust, while also allowing the lemons to macerate alongside a bit of lavender. Just long enough for the flavor to develop nicely. Removed the lavender spring and baked.
- Brightland Parasol: I love the citrus notes in this one. It’s a vinegar fermented with chardonnay grapes and Valencia and Navel oranges, 5% acidity.
How To Roll Out Pie Dough
Let’s just walk it though here step-by-step. After the pie dough has chilled for two hours, it is time to roll it out. Lightly flour the your counter, rolling pin, and your hands. If at any point in the process the dough is sticking, dust with more flour. Start from the center of the dough and roll out in all directions, turning the dough regularly as you go. Roll the dough a couple inches larger than your pie dish. I’ve found that if you start having cracks and fissures at the edges of your dough as you're rolling, you can often use the rolling pin around the perimeter (like you were going around a roller skating rink) and that closes the gaps nicely. It might also help to let it warm up for another couple of minutes in case it is too cold.
If you’re new to pie-making, you might want to roll out the pie dough on a large piece of lightly floured parchment paper. This allows you to easily transfer the dough to the refrigerator if you need to chill it a bit mid-roll. Chill for 7-10 minutes and proceed.
I’m sure you can tell, this recipe and my technique will likely continue to evolve little by little over the years. That’s part of what is great about cooking and baking. And wherever you land on pie making, I encourage you to make your own crust. It’s night and day from most store-bought doughs. I hope you love this pie dough as much as I do!
Variations
Rye: If you'd like to incorporate a bit of rye into your pie crust, I highly recommend it! This lends a subtle rustic quality and depth of flavor hard to achieve using all-purpose flour exclusively. I love using a bit if rye in the crust of my apple pie. Simply use the recipe below and use 270 grams of unbleached all-purpose flour plus 60 grams of dark rye flour. Proceed with the recipe as written.
More Pie Recipes
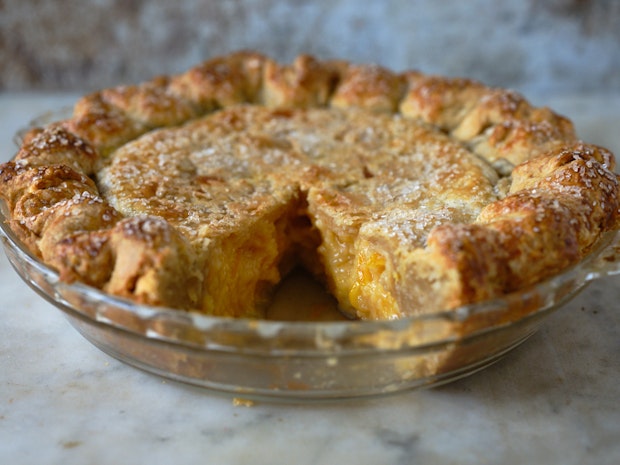
- My favorite pie: This Shaker lemon pie is my go-to pie more often than not. Especially when Meyer lemons are around. In Southern California that is often!
- Deep Dish Quiche: Use this pie crust as the crust for an amazing deep dish quiche.
- Shaker Apple Pie: a special apple pie using a splash of rose water in place of vanilla. Really wonderful and fragrant!
- Pumpkin Pie
- Coconut Cream Pie
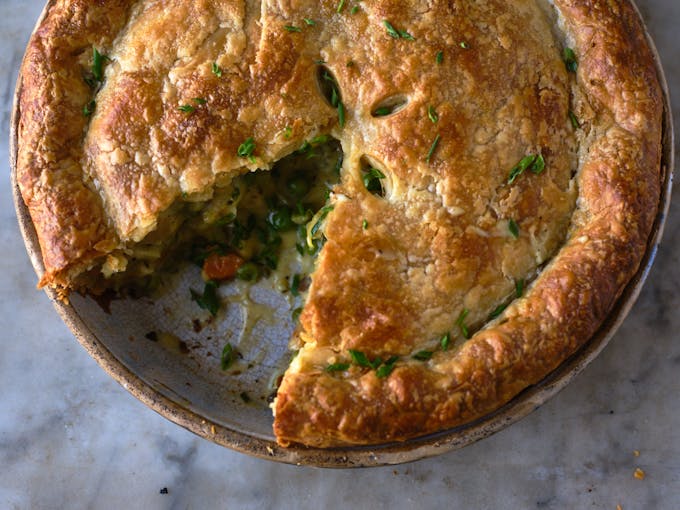
- Vegetable Pot Pie
- Peach Hand Pies
- Berry Pie
- Heavenly Chocolate Pie


Premium Ad-Free membership includes:
-Ad-free content
-Print-friendly recipes
-Spice / Herb / Flower / Zest recipe collection PDF
-Weeknight Express recipe collection PDF
-Surprise bonuses throughout the year
All-Butter Flaky Pie Crust
Beyond the guidance below, a couple good rules of thumb when making pie crust are the following. Work quickly. Work deliberately. Work confidently. If at any point in the pie making process your pie dough is getting too warm, sticky, or hard to work with, transfer it on a sheet of parchment paper or baking sheet to the refrigerator for a few minutes before trying again. If you’re making this dough for a savory pie, leave out the sugar. This recipe makes two 9-inch pie crusts.
- 1/2 cup (120 ml) hot water
- 2 tablespoons (30g) granulated sugar or dark brown sugar
- 1 tablespoon good tasting vinegar
- 1 1/2 teaspoons fine grain sea salt
- 2 2/3 cups (330g) unbleached all-purpose flour
- 2 sticks (225g) very cold unsalted butter, cut into 3/4-inch chunks
-
Combine the hot water, sugar, vinegar, salt in a measuring cup or jar. Stir until the sugar dissolves and chill in the freezer until very cold - 10-15 minutes or so.
-
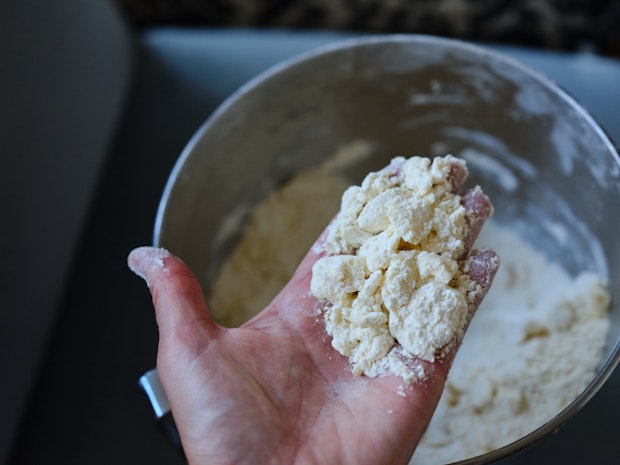
Combine the flour and butter in the bowl of an electric mixer with the paddle attachment. Cover the mixer with a clean kitchen towel to keep flour in the bowl, and mix on low speed until the butter and flour smears and combines into an uneven, shaggy and pebble-like texture - 20 seconds or so.
-
Remove the towel, and, continuing on low speed, very slowly drizzle in about half of the sugar-water mixture. Continue mixing just until the dough comes together adding more water, a bit at a time, if needed. The dough comes together quickly, in ten or twenty seconds or so, and you may not need to use all the water. I typically use about half the water and have about 1/4 cup leftover.
-
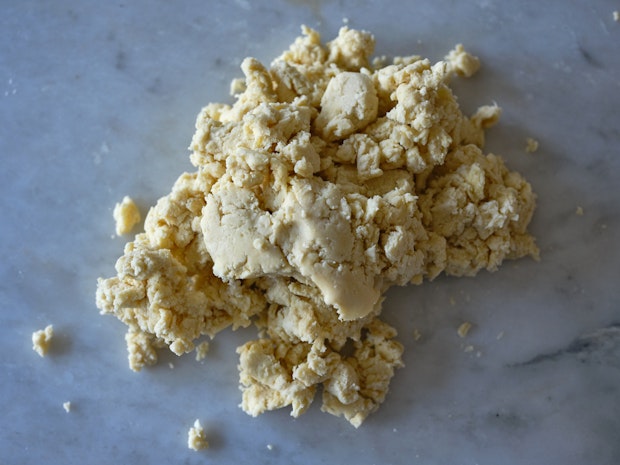
Working quickly, turn the dough out onto a counter and use floured hands to press together into one large mound. Divide the dough in half with a bench scraper or knife and shape each half into a 1-inch thick disc. Wrap each half tightly in plastic and refrigerate for two hours before using. You can also freeze the dough at this point for later use.
-
When ready to shape the dough, lightly flour the your counter, rolling pin, and your hands. If at any point in the process the dough is sticking, dust with more flour. If you’re new to pie-making, you might want to roll out the pie dough on a large piece of lightly floured parchment paper. This allows you to easily transfer the dough to the refrigerator if you need to chill it a bit mid-roll. Chill for 7-10 minutes and proceed. Start from the center of the dough and roll out in all directions, turning the dough regularly as you go. Roll the dough so it is evenly thick throughout, and an inch or two larger than your pie dish. I’ve found that if you start having cracks and fissures at the edges of your pie dough you can often use the rolling pin around the perimeter (like you were going around a roller skating rink) and that closes the gaps nicely. It might also help to let it warm up for another couple of minutes in case the dough is a bit too cold for rolling.
-
Transfer the dough to a pie dish by gently wrapping it around your rolling pin and unrolling it over the pie dish. Coax the pie dough into place, and then press gently into the baking dish.
-
For a single-crusted pie, use a pair of scissors or a sharp paring knife to trim the dough so it overhangs by just a bit. For a double-crusted pie, fill it at this stage, and then drape the second pie crust over the top. Trim the top crust at this point. Pinch and seal the top crust to the bottom crust and then fold either over or under. I tend to like under.
-
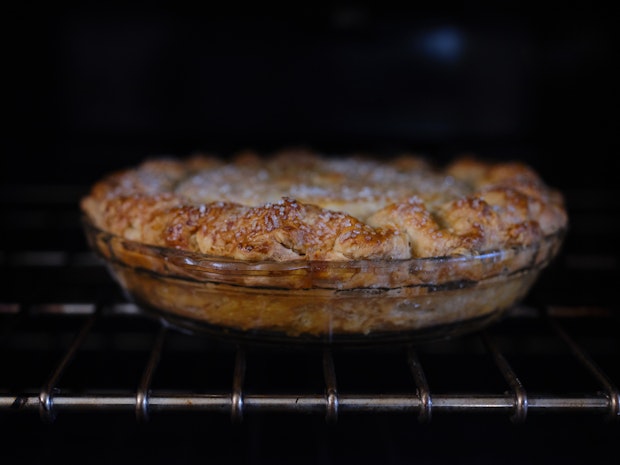
Crump the edge of the pie with a fork, or flute the edge using the thumb and forefinger of one hand, and the forefinger of the other. Freeze for 15 minutes before baking.
-
For a double crusted pie, cut a few slashes into the top to allow steam to escape brush lightly with a beaten egg just before the pie goes in the oven.
Makes two 9-inch pie crusts.
Related Recipes

Shaker Lemon Pie
The defining detail of this lemon Shaker pie is the use of whole lemons for the filling. Thin slices of lemon including the peel, pith, and flesh are macerated in sugar and then turned into a vibrant, flavor-packed, custardy filling. Pair this with a flaky all-butter pie crust and you've got something special on your hands.
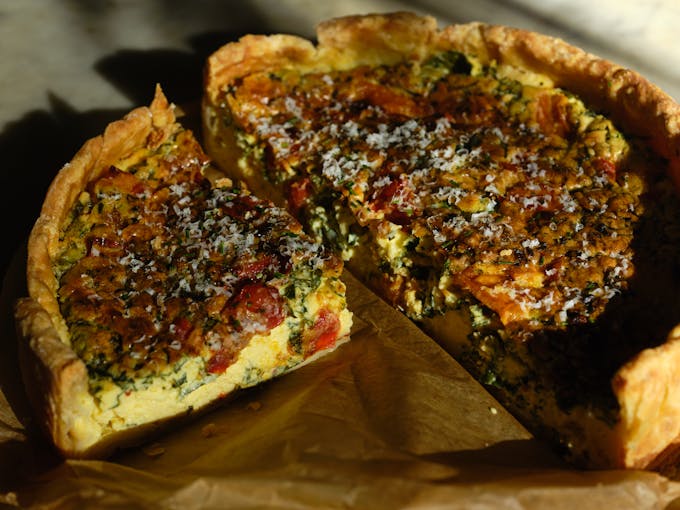
Deep Dish Quiche
The deep dish quiche of your dreams. It’s made with a flaky all-butter crust. The filling is silky smooth and creamy, while still being perfectly sliceable. Switch up the add-ins based on the seasons - roasted cherry tomatoes in summer, winter squash later in the year.

Shaker Apple Pie
The defining detail of this traditional Shaker apple pie is the use of rose water in the filling. Sliced apples, brown sugar, and a splash of floral results in a special combination. Pair it with an all-butter crust and you have a beautiful apple pie on your hands.
Vegetable Pot Pie
This hearty vegetable pot pie is made with a flaky, all-butter pie crust encasing a creamy, herbed potato, carrot, pea and onion filling. A homemade savory pie like this is such a treat! There are a couple tips you should know to help you take it from good to exceptional.
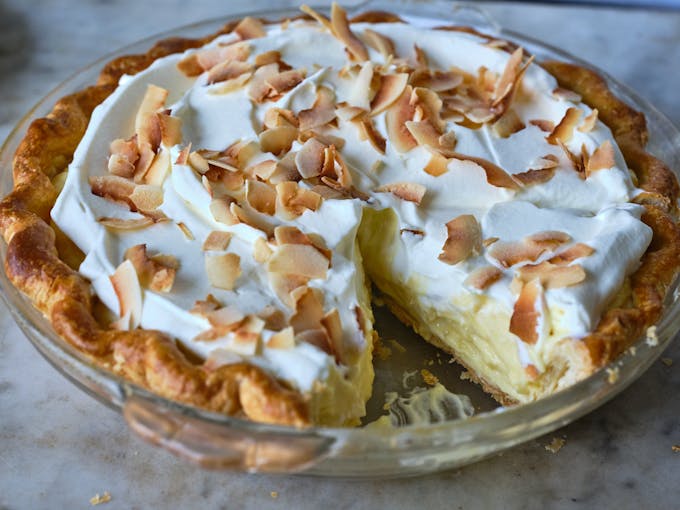
Homemade Coconut Cream Pie
There are a couple details that take this coconut cream pie to the next level. Like many versions, it is made with a homemade, flaky, all-butter pie crust filled with a creamy coconut pudding. It is finished with clouds of whipped cream and plenty of toasted coconut flakes. Using buttermilk and a confident amount of salt to offset some of the sweetness is how you take this pie from good to great.
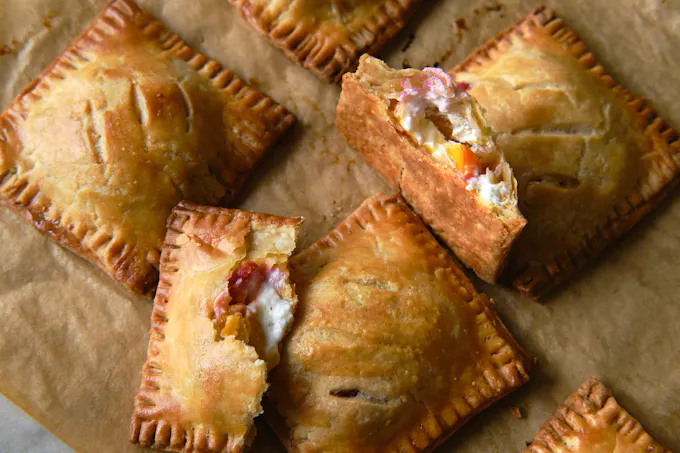
Peach Hand Pies
These peach hand pies are next-level good! Made with a flaky, fool-proof, all-butter pie dough and filled with ripe peaches, goat cheese, plus a bit of green chile and basil, they ride the delicious line between savory and sweet.
Post Your Comment
Comments
Awesome pie crust and easy to make following the recipe here. Looked and tasted superb! I used some rye flour, as you suggested, and it was delicious and beautifully structured. I always used the food processor but the paddle attachment and stand mixer worked better. I kept freezing it for a few minutes and that really helped. I was looking for the lentil soup with brown butter recipe, which is a family favorite, and I stumbled upon this recipe just when rehearsals for Thanksgiving were starting. No need to look further; this is my new pie crust recipe.
Whooop! Love reading this Wendy. Glad you liked it.
I don’t have an electric mixer, could you suggest alternative options?
Hi Sharon, you use swap in a food processor for the mixer or you can do a manual version. Basically, you’d make your pile of flour, place the slabs over butter over the flour, and the heel of your palm to quickly smear it into the flour. Use a dough scraper re-organize, and smear again until you have butter chunks well distributed throughout. Then drizzle in the liquid and smear some more. Collecting the dough into rounds at the end.
At one point do you freeze the dough if making in advance? I’d love to have a day to make several crusts that I can pull out and use later. Should I roll them out all the way and store them in aluminum plates? Or just roll them out flat and then thaw from there? I’d like them to be as oven-ready as possible.
Hi Beth, I freeze them in disk form – prior to any rolling out. The day before baking transfer to the refrigerator to thaw, remove, allow to warm for 10-15 minutes, roll and shape. I think you’re asking if you can roll them flat and freeze, the answer is yes, I just find it easier to store the other way.
Hi. Just a quick mention a tip I’ve learned. I like to rub my counter down with ice to chill it before I start rolling the dough. And definitely I pop it in and out of the fridge as I’m working with it. Doing this, I had great success with my first butter crust.
Thanks for your great recipe!
This post gave me the confidence to try 1) making crust, and 2) lattice. My husband wondered what the big deal was and I told him that there are two types of families – Those that make pie crust, and those that avoid making pie crust at all costs. I come from the latter.
Turned out great! It’s is in the oven now. Rustic-looking, which I’m OK with for the first time. I used your Berry Pie recipe to fill it with blackberries I picked myself. Tonight there shall be pie!
Thank you.
Wooohoooo! That’s amazing Jan. I love that you went straight for the lattice.
Your pies are beautiful! I am determined to make your Veggie Pot Pie so I had to check out your crust recipe. Can’t wait to try it!
Give it a go Lynn!
Heidi: The link to Pim crust had SALTED butter – I prefer less salt so I like unsalted. Do you think it makes a difference?
Generally speaking, using unsalted butter allows you to control the exact amount of salt you’re adding. You could certainly use unsalted, and then add salt to taste. Make note, and adjust over a few bakes.
Can you use GF flour?
Hi CS – I haven’t tested with GF flour, but let me know if you do!
More Recipes
Weekly recipes and inspirations.
Popular Ingredients