Super Swiss Meringues
Let’s make beautiful, billowy Swiss meringue! You can shape it into all sorts of shapes and swooshes, or punctuate with a range of nuts, seeds, and spices.
Let’s make beautiful, billowy meringues! Few treats are more charming or versatile. The first order of business is deciding which method to use - there are a number of options. More often than not, I go the Swiss meringue route, which I’ll explain below. A lot of people like to use the French method - where you whisk eggs until they are nice and frothy, adding granulated sugar, a bit at a time. I wouldn’t disagree that it’s the simplest method, but I like the Swiss meringue approach instead, for a number of reasons.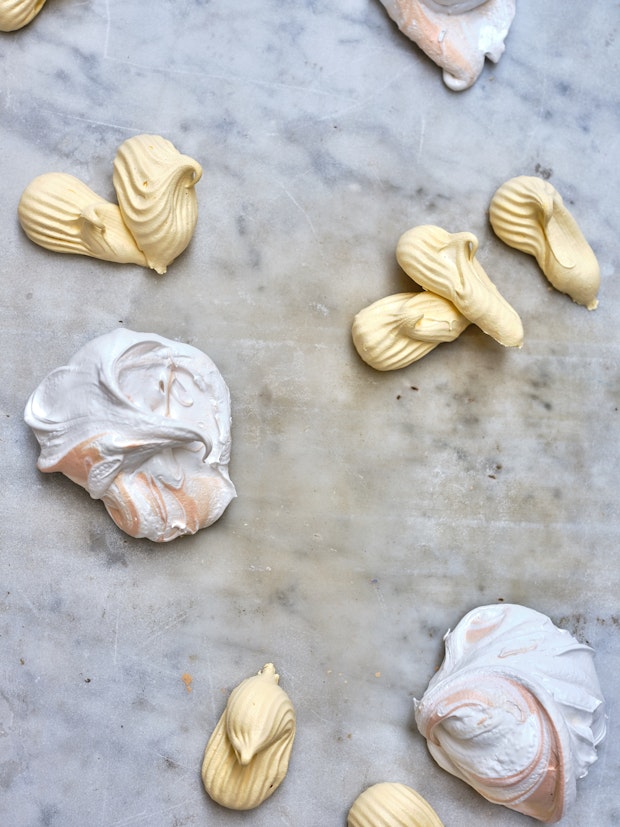
Swiss Meringue Technique
To make Swiss meringue, you basically combine all your ingredients in a mixing bowl. Heat it over a pan of simmering water until smooth, and then pop that mixing bowl back into your mixer. Whisk until you have a beautiful, bright, glossy meringue. It’s quite straight-forward. I think cooking sugar always freaks people out, and to do it right, you should use a thermometer, but don't let that deter you.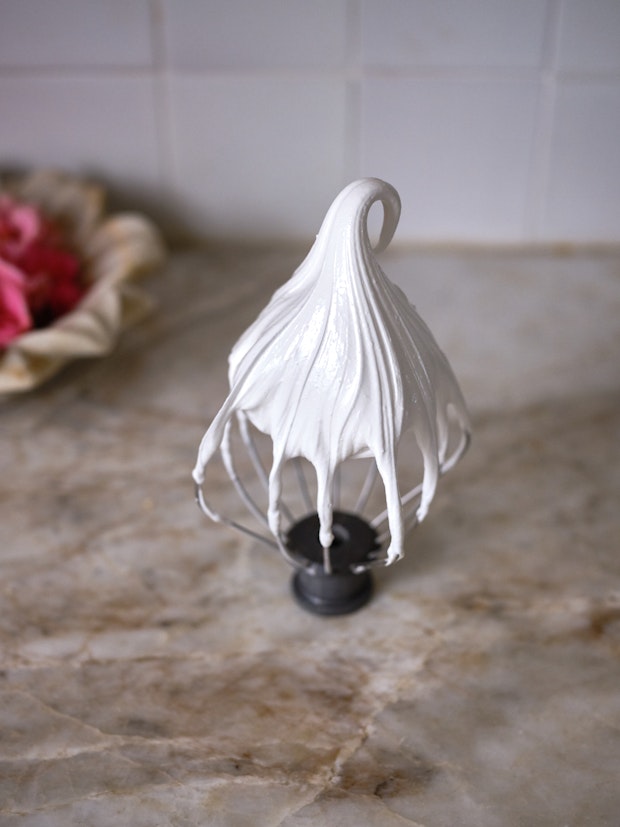
Why Swiss Meringue?
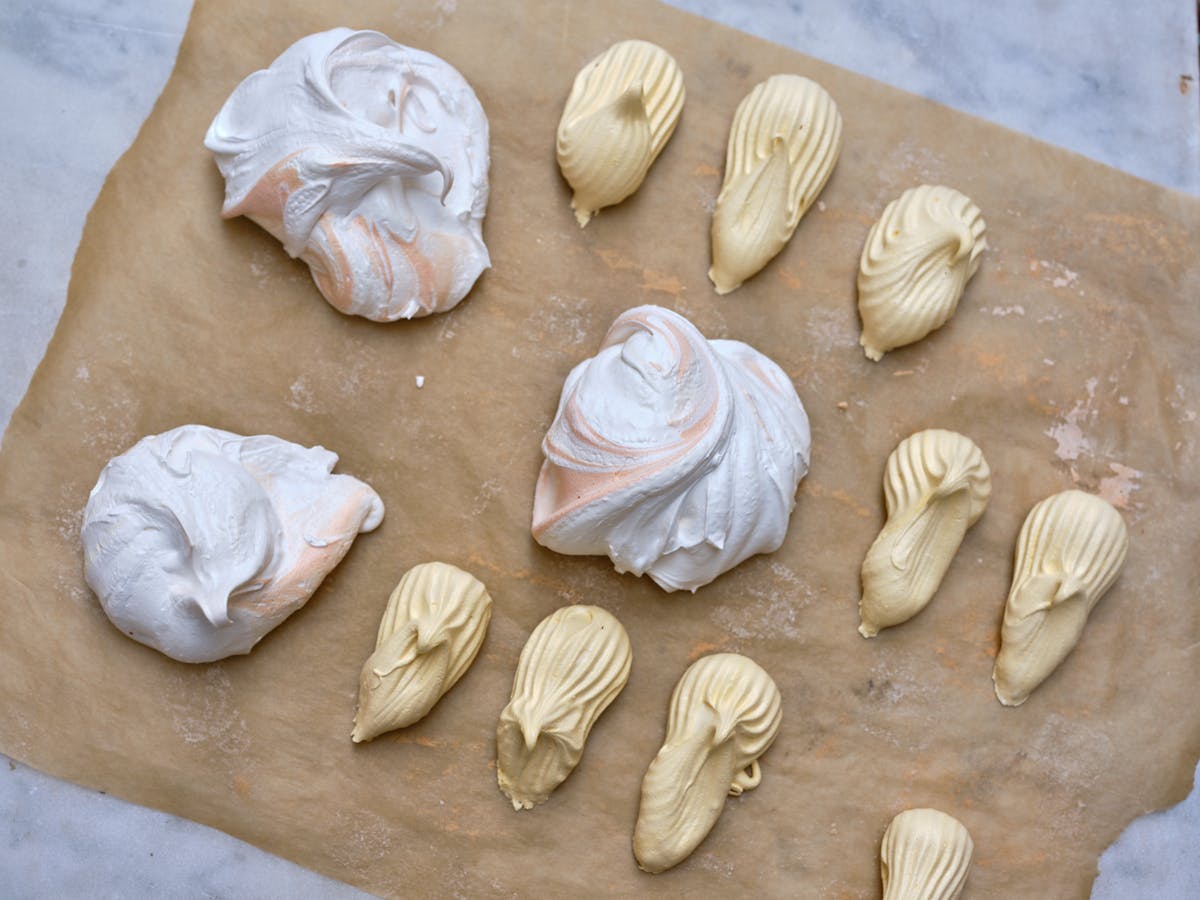
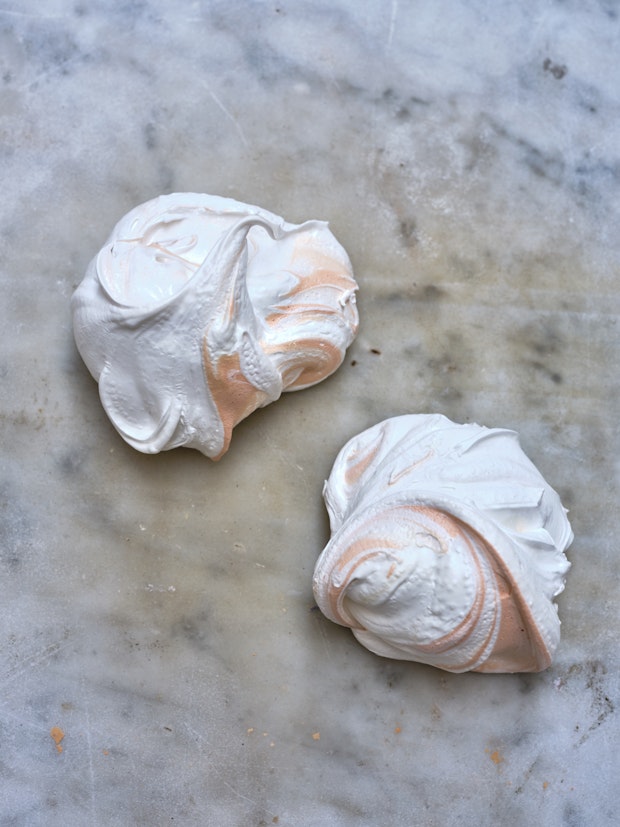
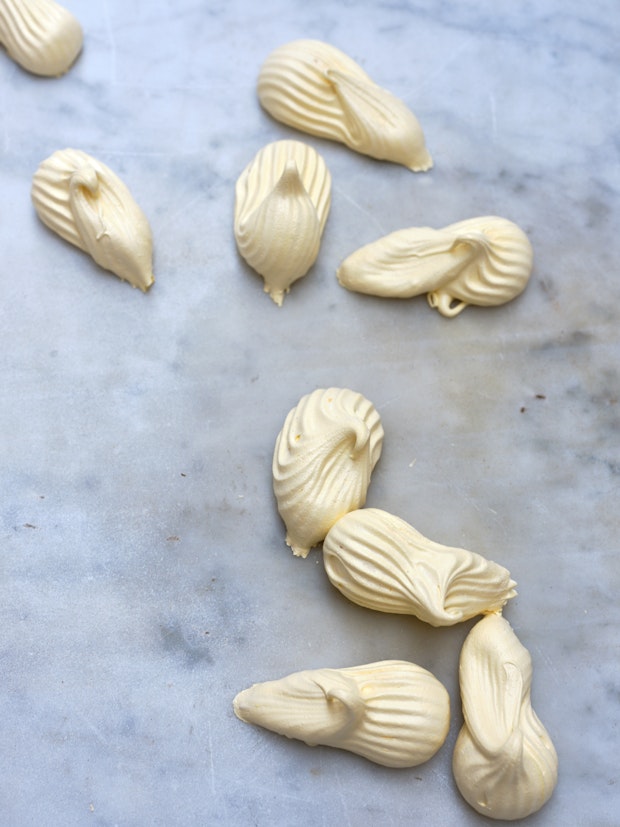
Reason number one, you don’t have to remember to bring your eggs to room temperature. This is major. I always forget to pull my eggs from the refrigerator. You don’t have to worry about this if you’re using the Swiss approach. The second thing, I like to be able to pipe my meringue into somewhat intricate shapes (see photos). I have much better luck with Swiss meringue. It’s stiffer, and holds ridges, dollops, and flourishes better. If you’re trying to avoid blobby meringue, start here.
Keys to Success
1) Use a completely clean, dry bowl, whisk, spatula, etc. to get the most volume of meringue. Any residual oils will hamper your efforts.
2) Adjust your baking time based on whether you’re like a chewier or crisper meringue. Leave them to bake longer for crisper. Up to a few hours even!
3) If you do leave your meringues to bake longer, just be sure they aren’t taking on any/too much color. Ways to counter coloring: gently rotate pans, propping over door open with a wooden spoon, moving baking sheets either up or down in oven.
4) To maintain a glossy sheen and texture, try not to slam your oven door or baking sheet while baking. They might collapse a bit and end up with a crackled texture.
Favorite Add-ins
The recipe below is a nice base recipe. Once you get the hang of it play around with different add-ins. I love to stir in cacao nibs, toasted coconut flakes, saffron bloomed in the almond extract, dried rose petals + rose extract, lots of mixed sesame seeds, or toasted pistachios.

Premium Ad-Free membership includes:
-Ad-free content
-Print-friendly recipes
-Spice / Herb / Flower / Zest recipe collection PDF
-Weeknight Express recipe collection PDF
-Surprise bonuses throughout the year
Super Swiss Meringues
Meringues are incredibly versatile! Experiment with different shapes, colors, and add-ins. Most recipes use vanilla extract (totally fine!), but I love almond extract in its place.
- 6 ounces egg whites (from ~5 eggs)
- 1 1/2 cups sugar (10.5 ounces)
- 1/4 teaspoon cream of tartar
- 1/4 teaspoon fine grain salt
- 1 teaspoon almond extract
-
Preheat oven to 225F. Combine all the ingredients in the stainless steel bowl of an electric mixer. Set the bowl over a saucepan of simmering water over medium-high heat (you’re basically making a double boiler here). Whisk the mixture continuously until the sugar is completely dissolved, and the mixture reaches 175-180F on a thermometer - very warm-hot to the touch.
-
Re-attach the bowl to the mixer and whisk on high-speed until very stiff peaks form, and the mixture has cooled - 7 - 10 minutes.
-
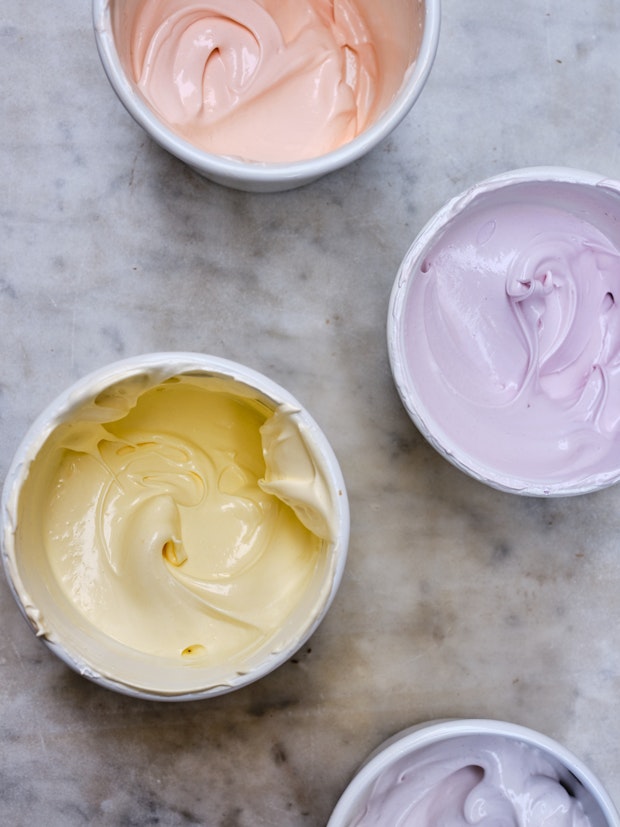
If you’re going to color the meringue divide into multiple bowls and fold in drops of natural coloring. Now, either drop by billowy spoonfuls, or transfer to a pastry bag with desired tip, and pipe onto parchment lined baking sheets.
-
Bake for 25 minutes, and then prop the oven door an inch or two open with a wooden spoon, and continue to bake until the meringues form a dry shell and can be lifted easily from the baking sheets - another 20-30 minutes. Take a bit to see if the centers are to your liking. For dryer, less chewy meringues allow them to bake longer. Smaller meringues will bake more quickly than larger ones. It’s really a personal preference here.
-
I tend to turn off the oven when I feel like mine are just about done, leave the door propped open, and allow them to set as the oven cools. Just set a timer to check-in now and then, removing them when they’re the texture you like. Alternately, you can let them cool completely on a wire rack. Store in an airtight container at room temperature for up to a few days.
Makes 6-8 extra-large meringues, or a couple dozen smaller ones.
Related Recipes

Best Chocolate Cookies
This is the best chocolate cookie I bake. And I don’t say that lightly. It’s a crackle-edged puddle of chocolate with a texture like a collision between a soft meringue and a fudgy brownie. Part of my essential cookie repertoire!
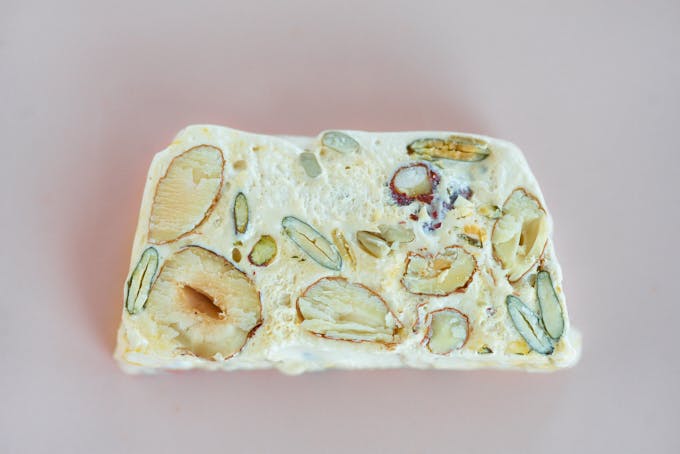
Fluffy Vanilla Nougat
How to make beautiful, billowy vanilla nougat to which you can add all kinds of nuts, seeds, and dried fruit.
Glissade Chocolate Pudding
A chocolate pudding that is hard to beat. From this day forward, if you come to my house for dinner, and I decide chocolate pudding might be a nice finish to the meal, this is the recipe I'll be using.
Post Your Comment
Comments
Wow! The colours! What are they?
I used natural food coloring for these. Pretty, and fun to mix up colors for a range of meringue shades.
Every time I make meringues (or marshmallow fluff, which uses more or less the same technique), the cream of tartar becomes these weird, stringy, almost plasticky bits that wrap themselves around the whisk on my stand mixer. What is up with that? I tossed the old bottle of cream of tartar, thinking maybe it was old, but the same thing happened with the new bottle. What is going on? Has this happened to you? Is there something I can do to prevent it? I’m so glad you posted this recipe, because this question has plagued me for a few years now!
I’ve made it both ways, but unfortunately neither holds up past a few hours in the humidity of the Northern CA coast. Living in the BayArea I was able to make lovely ones with crushed peppermints and some stripes of food coloring. What’s that striping yours?
I never bring my eggs to room temperature by leaving them out for hours. I put them in warm water for 15 minutes. it works perfectly and is no more unhealthy than the alternative.
More Recipes
Weekly recipes and inspirations.
Popular Ingredients