Braided Onion Bread
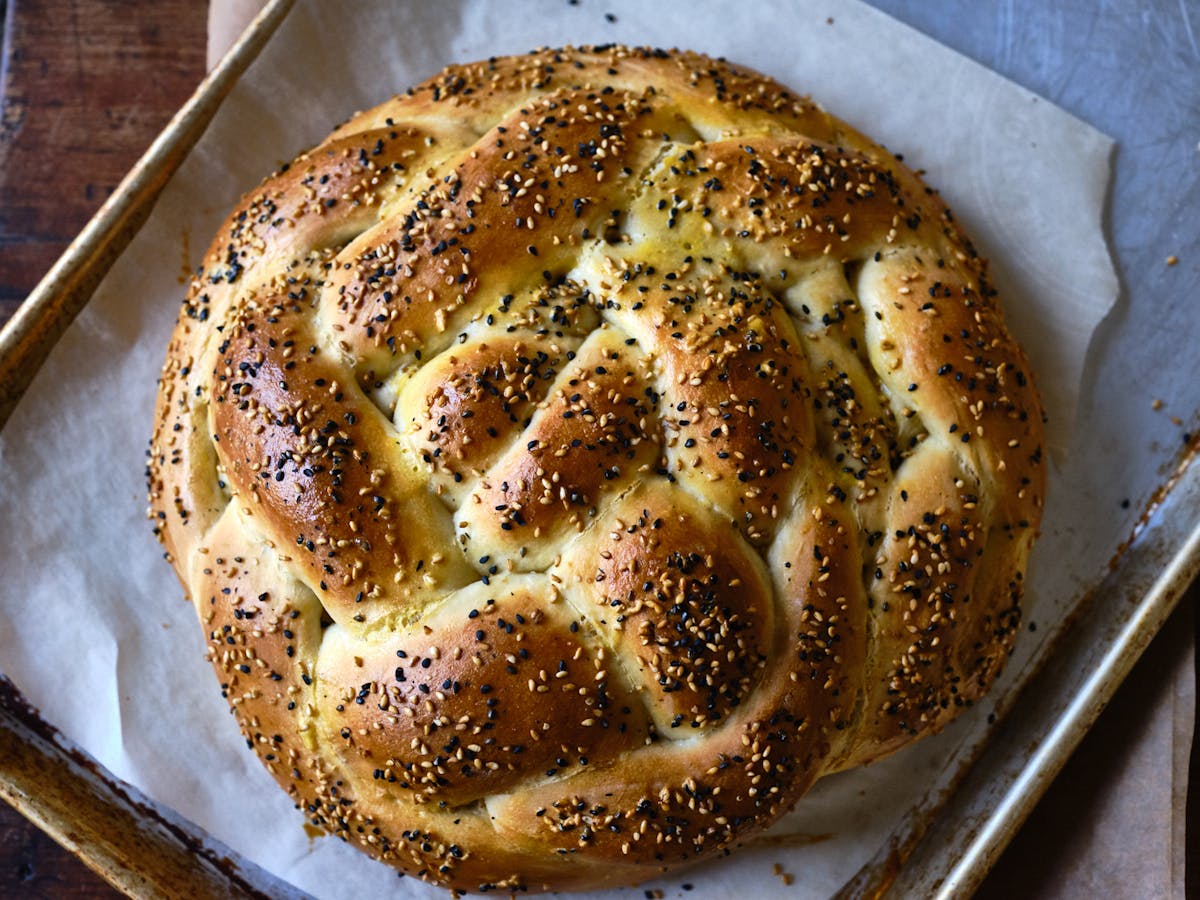
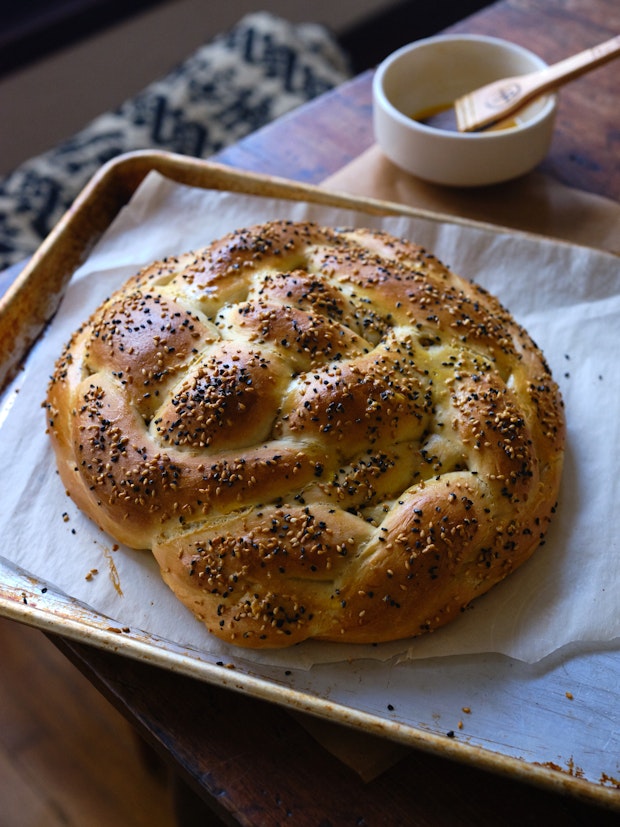
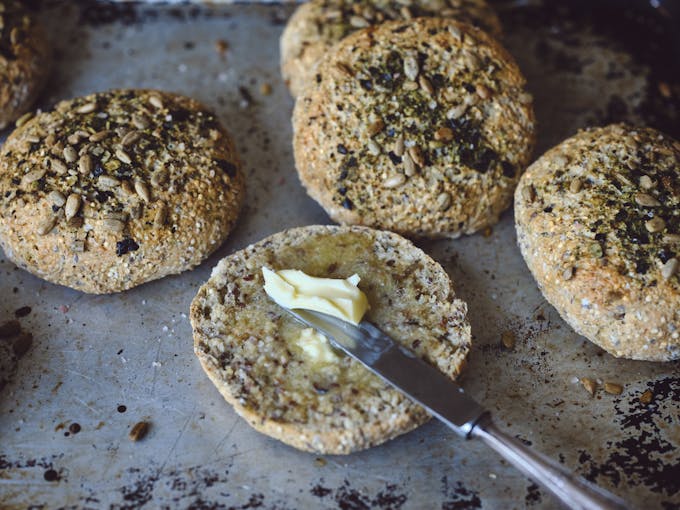
This braided onion bread is made with a rich, buttery, yeast-based dough. Each of the four strands in the braid is stuffed with a caramelized onion and grated cheese mixture.
One of my first memories related to baking was a demonstration conducted at my kindergarten where bread dough was shaped into turtles, and birds, and elaborate braids. Scissors were used to create the tiny bread spikes on the backs of alligator and hedgehog-shaped loaves. Lobster claws got a snip up the center for visual effect and each figure was placed in an oven until puffy, golden, and fragrant. We were each allowed to take one home. The whole experience blew my five year-old mind. 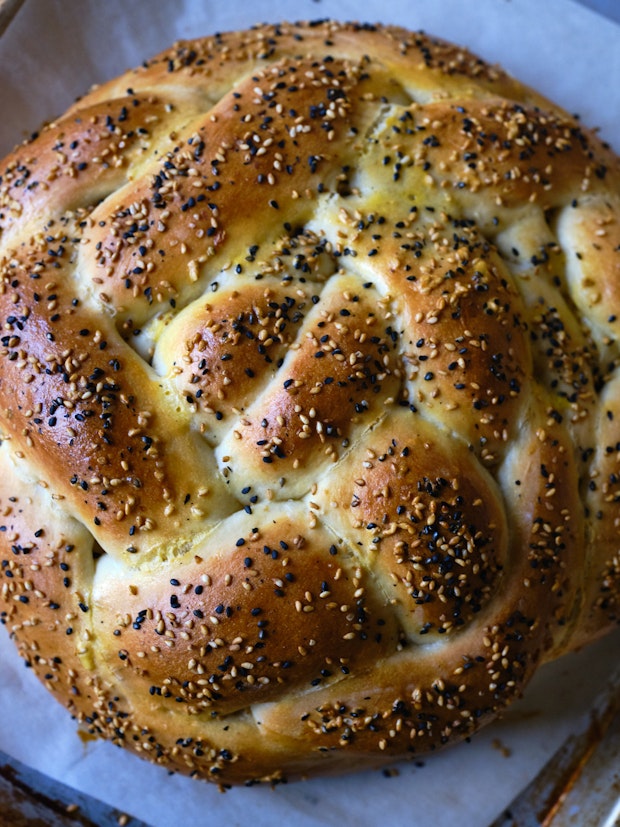
I still like to bake elaborate braided loaves. Especially when things in my life are tumultuous. I made this one a couple of times prior to the holidays, and decided to make it again last week to photograph and share with you. It's made with a rich, buttery, yeast-based dough. Each of the four strands in the braid is stuffed with a caramelized onion and grated cheese mixture. If you've never baked a braided loaf before, I'll admit that stuffing the strands adds a layer of complexity, but the whole process is incredibly forgiving if you commit and keep going. If you look at the shape below and think "no way" just remember it's a simple braid coiled into a snail shape.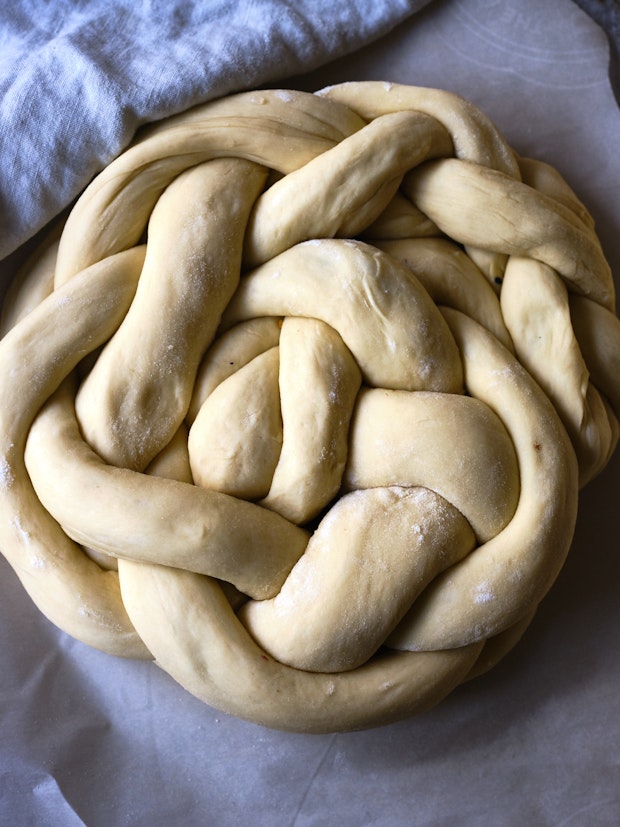
The (Stuffed) Braided Bread Process
To make this bread you start by making beautiful yeast dough. You roll your dough into a rectangle, cut that rectangle into four strips, and then stuff each strand with awesomeness. I usually prepare the stuffing a day ahead of time, or the morning of the day I plan on baking. This gives the filling some time to cool. I've locked onto this onion-cheese combo lately, but you can imagine endless variations.
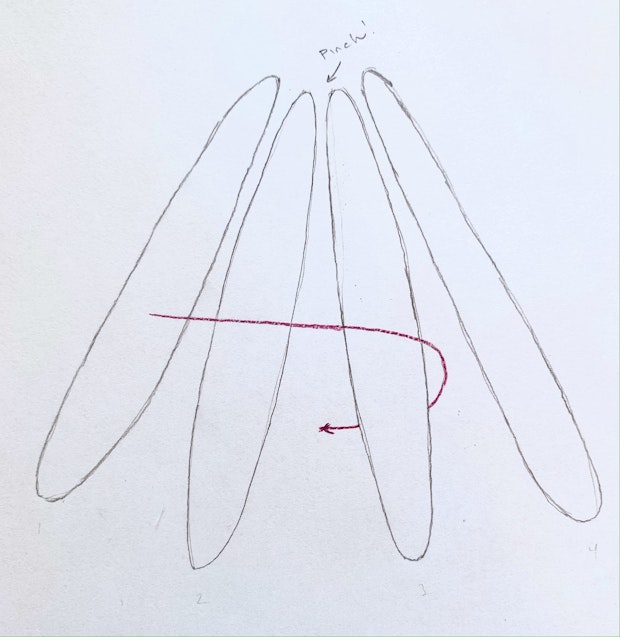
To fill the dough, you run the filling in a line up the middle of each of the four strips of dough. Fold them each in half, and then pinch the seam to seal the filling in. Now you have four filled strands that you'll arrange side-by-side (below). Pinch them together at the top and start braiding (see diagram below). Coil the braid into a tight round, snail shape, let the dough rise, brush with an egg wash, and bake!
A Four-strand Braid
First, let me say - if you’re worried about trying the four-strand braid, I understand! If you want to fall back to a chubby three-strand bread braid the first time through, go for it. The main thing is to commit to the braid either way. Even if you're convinced things aren’t going well. This feeling can be triggered by a few things. A common problem is strands splitting open to reveal the filling - just re-pinch and keep going. Or, you might feel like your strands keep stretching and getting longer and longer? It’s ok, you will coil them into a round shape. Keep braiding even if your strands are longer than your sheet pan. Boss the dough around a bit. If it’s too sticky, dust with a bit of flour. The main thing? Don’t get discouraged, keep going.
Please let me know if you bake a braided loaf. Or, if you experiment with other fillings, please leave a comment. I can't wait to see what you do with this one. I loved seeing all of you posting soup pics last week.
And if you're ready to use your oven some more, here’s where you can browse all the baking recipes.
More Bread Recipes:
- Zucchini Bread
- Skillet Cornbread
- Black Bread
- Cheddar Jalapeno Oatmeal Bread
- Easy Little Bread
- Lemon Focaccia
- Big Sur Bakery Hide Bread
- Six Seed Soda Bread


Premium Ad-Free membership includes:
-Ad-free content
-Print-friendly recipes
-Spice / Herb / Flower / Zest recipe collection PDF
-Weeknight Express recipe collection PDF
-Surprise bonuses throughout the year
Braided Onion Bread
Use your favorite strong, shreddable aged cheese here. I’ve been using a local aged cheddar, but Gruyere or Parmesan or something along those lines will also work well. If you want to make two smaller loaves in place of a single large one, you can divide the dough in half, and do two smaller braids. When I do that I cut the 12x16-inch dough rectangle into eight strips along the length, each 2-inches wide, fill each of the little strips with onions, and use four for the first braid, and another four for the second braid. Baking time will be less, so keep an eye on them and adjust.
- 3 tablespoons extra virgin olive oil
- 4 cups chopped yellow onion (~2 large)
- Fine grain sea salt
- 1 cup aged cheddar cheese, grated
- 1/3 cup toasted sesame seeds
- 4 1/2 cups / 540g unbleached all-purpose flour, plus more if needed
- 2 tablespoons sugar
- 1 1/2 teaspoons fine grain sea salt
- 2 1/2 teaspoon (1 packet) active dry yeast
- 1 1/2 cups warm milk or oat milk (120F)
- 1 egg, beaten
- 8 tablespoons unsalted butter, room temperature
- 1 egg yolk
-
Line a baking sheet with parchment paper and set aside.
-
Start by making the filling. You can do this a day or two ahead of time, and refrigerate. Heat the olive oil over medium-high heat, and stir in the onions along with a generous pinch of salt. Saute, stirring regularly, until the onions get brown and caramelized - twenty minutes or so. Remove from heat, allow to cool, and then stir in the cheese and 1/4 cup of the sesame seeds. Set aside or refrigerate until ready to use. If you’ve cooked your filling ahead of time and refrigerated it, bring it back to room temperature before filling your dough.
-
To make the dough, combine 2 cups of the flour, the sugar, salt, and yeast in a medium bowl. Add the warm milk and stir just until you don’t see any more dry flour. Add the egg and butter, and stir until it is all incorporated. Add the rest of the flour (the remaining 2 1/2 cups) and stir until you have a nice, soft dough.
-
Turn the dough out onto a lightly floured surface, and knead until a cohesive, not-too-sticky dough forms. Dust with more flour, a tablespoon at a time, if your dough is too wet or tacky. Sometimes I need up to 1/4 cup more flour at this point. Knead for five minutes or so. I like to hold my bench scraper in one hand at this stage, to scrape the dough from the counter when it sticks. When you’re done kneading, transfer the dough to a lightly oiled bowl, and cover with a clean towel or plastic wrap. Place in a cozy or sunny spot. Allow to rise and double in size - usually between an hour or two.
-
Use your hand and gently press to deflate the dough. Turn out onto a floured surface, and roll the dough out into a rectangle roughly 12-inches wide and 16-inches long. Cut the dough lengthwise into strips 3-inches wide with a pizza cutter or knife. You’ll have four strips. Divide the filling into four equal portions (roughly 1/2 cup each), and spread a portion of it down just the center of each of the four strips, leaving the edges clear. Fold each strip in half and pinch to seal the filling in all the way down the length of each strip. At this point you should have 4 “tubes” of filled dough, and it’s time to braid!
-
Quickly and assertively transfer the strips to your parchment lined baking sheet a couple inches apart. Ideally, they’ll be seam side down. Now, this part can get a bit crazy, don’t get flustered. If the strips stretch out, don’t panic. If they’re longer than the pan, don’t sweat it. Just keep going. You’re going to braid and coil the dough, so most of the mistakes you make don’t really matter! Pinch the four strands together at the top, and start to braid.
-
Take a look at my sketch up above for more clarification, if needed. Take the left strand and move it over two strands (to the right) and under one strand back to the left. Switch to the other side: take the most right strand and lift it over two strands to the left and back under one strand to the right. Repeat, alternating from left side to right side until the loaf is complete. I find it easiest to say out loud, “over two under one, over two under one.” Pinch the ends together. Now, use your hands to coax the braid into a coil, like a snail shell. The fuller, top of the braid should be the center, and then keep wrapping around until you reach the end. Tuck the end under. It should be fairly snug. Cover loosely and allow to double in a cozy spot - usually 30 minutes to an hour. While you’re waiting, preheat your oven to 350F with a rack in the center.
-
Last step is to glaze your bread! Whisk the egg yolk with 2 tablespoons of water. Brush the dough completely with the glaze and sprinkle with the remaining sesame seeds. Bake until the bread is beautifully golden, and cooked through, roughly 35-40 minutes. To be extra sure, I use a thermometer to make sure the dough in the center reaches about 190F, and then you know you’re a-ok. Transfer to a baking rack to cool. Enjoy!
Makes one large loaf, or two smaller.
Related Recipes

Zucchini Bread
If you're looking for a go-to zucchini bread recipe, give this a shot. The recipe delivers a single beautiful loaf of walnut studded zucchini bread. Moist, just sweet enough and loaded with toasted walnuts inside and out, it has a sweet nut-crusted top, requires one pan and is a rustic stunner.
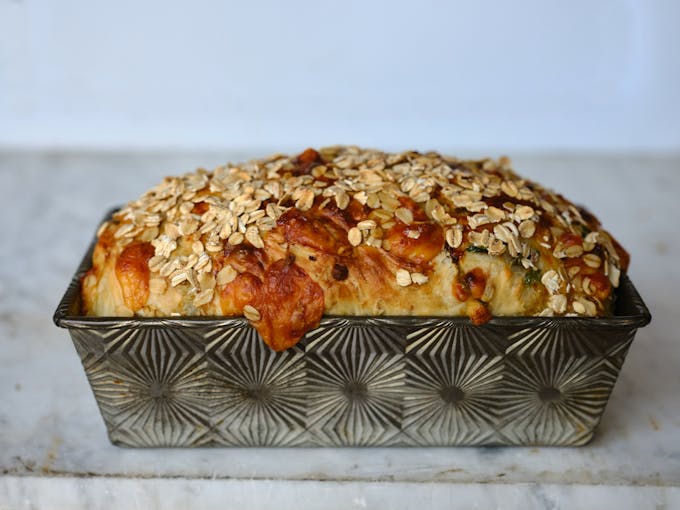
Cheddar Jalapeño Oatmeal Bread
This oatmeal bread wins the award for best toast. It’s a hearty oat-flecked loaf with a buttermilk base studded generously with melty cubes of cheddar cheese and punctuated with thin slices of jalapeño pepper. Where the cheese touches the pan it turns to golden-crispy perfection.
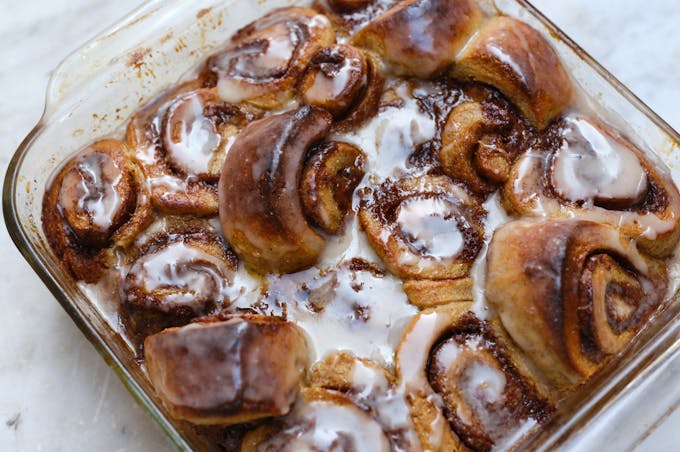
Cinnamon Rolls
Classic, homemade cinnamon rolls made from a favorite cardamom-flecked, buttery, yeast dough with a generous cinnamon-sugar swirl.
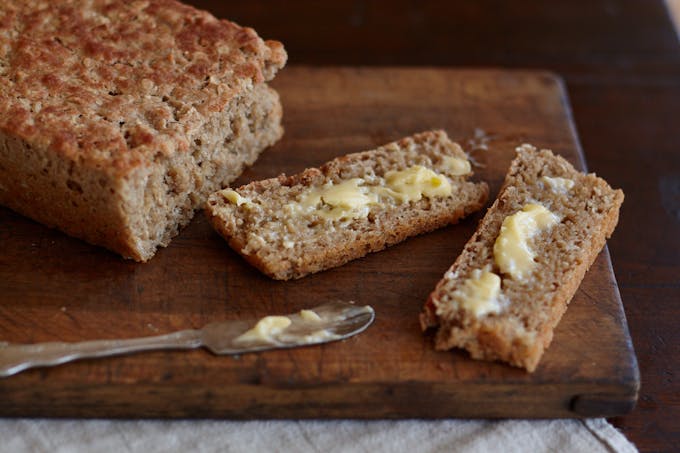
Easy Little Bread
The simple, easy little bread you should make right this minute - yeast-based, farm-style, made from rolled oats and a blend of all-purpose and whole wheat flours.
Big Sur Bakery Hide Bread
From the Big Sur Bakery cookbook, a seed-packed pocket bread recipe contributed by a good friend of the bakery. Sesame, sunflower, flax and poppy seeds, quinoa and oat bran impressively cram themselves into these delicious, hearty rolls.
Post Your Comment
Comments
I am going to try this bread it looks delicious
Thanks Deb!
This Braided Onion Bread is absolutely delicious! The bread is soft and fluffy, with a wonderful onion flavor that’s perfect for pairing with soups or enjoying on its own. The beautiful braided design also makes it a stunning addition to any table!
hi!! i’m super excited to make this bread, just have one question– i really don’t have a 3-4 hour block to do this all in one sitting, could i let this dough rise in the fridge for a longer period of time/refrigerate after rising in the morning and finish the braiding/baking in the evening? thank you!!
Hi s.b. – I think you’ll be fine. I might try mixing the dough using cold ingredients, immediately refrigerating, and then leaving the dough to chill overnight (or for 24 hours). Then resume the recipe from there with the rise at room temperature, braid, etc. And as I’m looking at the recipe again, if you have instant yeast, use that (maybe a shade less) in place of the active dry yeast.
Just made this today, my first stuffed bread and also my first time braiding bread – the recipe was so easy to follow and turned out beautifully. Will be making again.
So happy to hear it Jaz!
I made this yesterday for the first time and did struggle a bit with the braid. Everyone loved it! I plan to try this as dinner roll knots next!
How should this bread be best stored? Does it need to be refrigerated?
Best written recipe for bread baking ever if I had the power I would gift this recipe the title of Most Accurate Recipe for Bread Ever. You most certainly do need to be assertive with this bread and it’s well worth it! Didn’t change a dang thing and it was amazing, throw some ground meat in there and it’s a whole meal.
Oh this was amazing! Did two teaspoons kosher salt, according to the conversion tables, since I didn’t have fine or table salt, topped with not only the sesame seeds but also nigella seeds and flaky sea salt, and made two loaves in 9×4 pans. I’ve already eaten two slices and I’m sure half will be gone by tonight. I can’t wait to try and make a grilled cheese or other toasted sandwich with this bread, and I bet it would make amazing dinner rolls for Thanksgiving. Thanks so much for a delicious recipe!
Yes to dinner rolls tied in cute little knots!
Have you ever tried this with bread flour instead of AP? I have so much left over, I’d love to be able to use it
This bread recipe turned out amazing. I made two smaller braided loaves, ended up baking for 30 minutes to reach 190 degrees in the center (Baked them one at a time). Made the filling two days ahead of time so it was less to do on the day of the dough. The braiding seemed complicated when I was reading the recipe but was surprisingly easy once I was in the motion of doing it (even though I don’t think I 100% aced it). It looks beautiful and tasted great with my potato leek soup.
Yay! So happy you tackled it, and yes – the braiding is pretty forgiving. Love the soup combo!
Absolutely delicious! Braiding was fun, flavor was great and it looked beautiful. Other than not having any black sesame seeds I followed the recipe exactly. Family loved it, definitely a keeper recipe!
This was amazing! I sprinkled Trader Joe’s Everything But the Bagel seasoning on top. I appreciated that you posted the 190 degree rule to know if it was done, and that I had a digital thermometer! (Is 190 always the rule for baking being done?). Also I’m wondering if this can be stored at room temperature overnight? Guess I’ll find out soon!
It is so delicious!!!!!
This was absolutely delicious. I added some dried thyme, pepprika and parsley to the onions..,.I made this recipe vegan by subbing the egg in the bread with pumpkin puree and the egg wash with almond milk…,and the cheese inside with a vegan brand. It will be my go to for sure. The kids loved it.
Thanks for taking the time to report back on your version Tiffany! Glad it was a hit.
Wowza! Not as complicated as it comes across, which was a delight. Swapped 1/2 cup of the AP flour for rye and 1 tbsp of butter for sesame oil. Delish!! Also used a zataar sesame mixture and a generous sprinkling of maldon on top. Will be making again!!!
Love the rye + zataar move Elle!
wow – this bread was amazing! it looked just like your photos – just gorgeous. it is also huge – we managed (haha!) to eat it all, but it is a very large loaf, great for sharing! perhaps next time i’ll take your suggestion and make it into two loaves.
the only thing i did differently was to leave the sprinkled-on-top sesame seeds untoasted because they’ll toast in the oven; and, inspired by your black sesame seeds, i subbed half of the sesame for nigella seeds (kalonji) instead. it really added an interesting flavor – our toaster oven is still recovering.
thanks for such an awesome bake! 🙂
Thanks for the sweet note Jess! Glad you enjoyed it! xx!
This was fun to make! I just winged it with the braiding…. so it was a 4 braid-ish 🙂
Thank you. This was fun to make during this crazy time.
Why don’t you just knead the filling into the whole round of dough, and then divide into four to braid?
Give it a go Shirley! Might be amazing.
Thanks, great recipe! Just made it with one small variation: I used untoasted sesame seeds for the crust. They toast during baking, thus preventing burnt seeds.
this reminds me a little of Khachapuri (a georgian cheese filled bread i bought on the Arbat in Moscow. I must try it!
If ever there was a time when a video would be helpful! Written encouragement goes only so far. I will look on the web for four strand braiding instruction. The recipe looks delicious.
Lol. Indeed. Maybe I’ll try to shoot a video of the braiding for a future update!
More Recipes
Weekly recipes and inspirations.
Popular Ingredients